
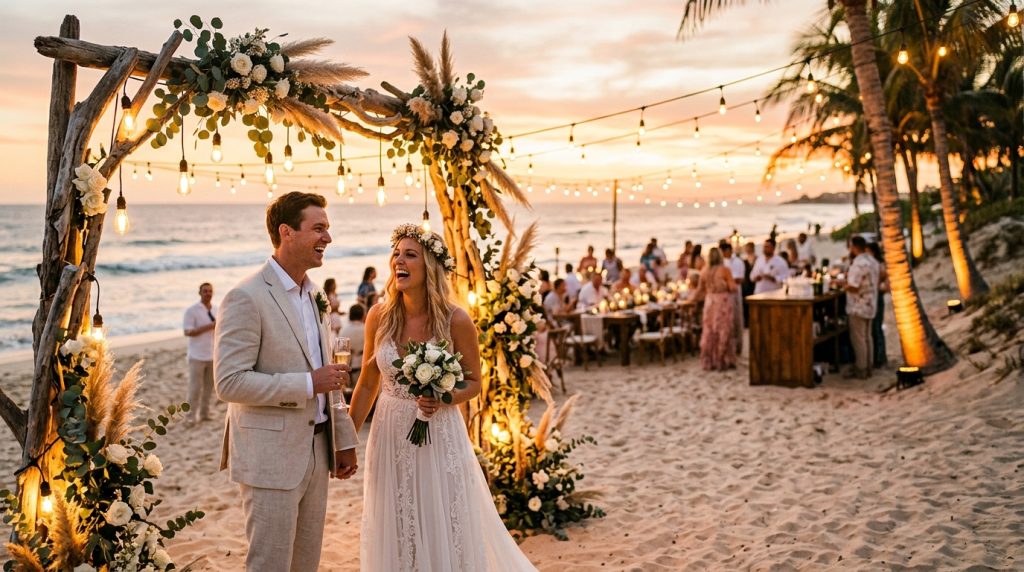
When you’re trying to figure out how to choose wedding reception lighting, put the camera first.
I learned this the hard way at my cousin’s oceanside reception — $400 of rental lighting looked great in person but ruined the photos.
You’ll learn what color temperatures flatter skin, the three lighting layers every reception needs, and how to spend $300–$1,200 to get picture-perfect results. This guide fits intimate elopements, micro-weddings, and budget-conscious receptions where photos matter most.
Pick a vibe: boho coastal, barefoot luxury, or minimalist shoreline.
If you want warm, film-like photos, aim for amber tones, Edison bistro strands, and a few dimmable pinspots — not a disco of RGB LEDs. Lately I’ve seen couples swap white tents for driftwood installations and soft uplighting; it photographs better and survives the wind.
1. Set The Scene: Ceremony Arch And Aisle Styling
Result: warm, textured photos with depth and no blown-out faces.
Start with the arch. I used a driftwood arch, wrapped with a 2–3 strand cluster of Edison bulbs (each strand ~25 ft). For aisle lights, low lanterns with LED candles give a flattering rim light on guests’ profiles.
Why it works: warm sidelighting sculpts faces. Overhead sun at noon flattens. A few warm point-lights create pockets of soft contrast photographers love.
What I bought: Brightech 25-ft Edison string lights (about $60 each), glass lanterns from West Elm on sale (~$45), battery LED candles ($15/pack). When searching on Amazon, you can use my tag theoceanvows if you like — it helps me keep recommending favorites.
Ugly truth: The venue’s built-in blue LED arch lights will make skin look green in photos. Ask to turn them off.
2. Layer Texture With Coastal Table Décor
Result: tables that read as intentional in photos — not blown highlights or muddy shadows.
Start with table runners in linen (raw sand or oyster grey). Place a warm LED candle cluster down the center and add tiny glass votives with Edison accents. Use pinspots (spot LEDs) to add a touch of light to centerpieces — not to overpower.
Why it works: low, warm light keeps faces flattering and makes metallics (cutlery, chargers) catch highlights without glare. Texture shows up; patterns don’t disappear.
Exacts I used: 3000K LED votives (battery, dimmable), linen runners from Etsy ($25 each), small pinspot lights rented from a local supplier (~$20 each/day). Ask for CRI 90+ bulbs so whites and skin tones render correctly.
Ugly truth: Candles alone often aren’t enough for tables after sunset — they look romantic but underexpose food and faces. Combine candles + subtle pinspots.
3. Dress For Sand And Wind: Bridal Look Essentials
Result: photos that flatter the bride and keep hair/makeup intact under real beach conditions.
Plan for wind. Soft updos with a few loose tendrils photograph best. Wear a veil you can clip off for portraits; veils flying at the wrong moment create shadow and motion blur.
Why it ties to lighting: photographers rely on catchlights in eyes. Position your portraits into soft, warm side light or use a reflector to bring light back into the eyes. Studio-like flashes are a last resort on windy beaches.
What I carried: a 30-inch collapsible reflector (~$20), hairspray and bobby pins from a coastal drugstore, a small LED continuous light (Aputure Amaran or similar) for touch-up portraits when the sunset fades.
Ugly truth: Flash can be harsh against sweaty skin and salt spray. If you must use flash, diffuse it and keep power low.
4. Light The Room: Reception Lighting Photographers Love
Result: flattering, consistent photos across the dance floor and dinner.
Think in three layers: ambient (warm overall color), accent (uplights and pinspots), and functional (dance floor and pathways). For bridesmaid photos and speeches you want ambient at 2700–3000K; those tones make skin look healthy.
Practical steps:
- Request dimmable fixtures. Dimmers let the photographer bump exposure without harshness.
- Use warm bistro/Edison strands for ambience. They sit around 2200–2700K.
- Add a couple of warm LED par cans with gels for uplighting (set low intensity).
- For the dance floor, a soft-wash LED that’s tunable but set to warm avoids that nightclub-blue look.
Specific gear & costs: Rent 2–4 LED par uplights (~$30–50 each), buy 2 strands of 50-bulb Edison lights ($90–$150), and a small continuous LED panel for portraits ($150–$300). Ask for CRI 90+ and 2700–3000K bulbs.
Unique angle: Ask your photographer which light they’d set as “key” and make that the default. I did this once and the couple’s first dance photos looked like magazine spreads.
Ugly truth: Venue power limits and curfews often prevent ideal setups. Confirm amps and run-times before buying or renting.
5. Finish With Florals, Favors, And The Photographer’s Wish List
Result: details that pop in stills without creating color casts.
Use natural-toned florals (cream, peach, muted coral) — these keep color palettes calm under warm light. Avoid neon flowers or highly reflective foil stationery that reads as glare.
Make a photographer’s list: want flash-free portraits? Note it. Need a clean-off for the first look? Reserve a spot with controlled lighting. Photographers love a 10-minute “golden hour” window scheduled into the timeline.
Where I sourced extras: shell place cards from a coastal décor shop ($3–$6 each), neutral linen napkins (I paid $18 each at a summer sale), and an emergency kit with makeup blotting papers and safety pins.
Common mistakes to avoid
- Relying on venue’s color wash lighting. Ugly Truth #1: built-in washes are often cool-toned and too strong.
- Using lots of RGB LEDs without a plan. Ugly Truth #2: colored LEDs photograph as banding or strange skin tones.
- Skipping a dimmer. Ugly Truth #3: without dimming you can’t control mood for photos.
Quick checklist before you book
- Ask venue for power amps and dimmer availability.
- Request 2700–3000K bulbs and CRI 90+ where possible.
- Plan three layers: ambient, accent, functional.
- Book a lighting tech for set-up if your budget allows ($150–$350).
Final note: Lighting made my cousin’s reception go from “meh” to cinematic. If you end up buying lights on Amazon, feel free to use my affiliate tag theoceanvows — it doesn’t cost you extra and helps me keep testing beach-friendly gear I can recommend from experience.
If you want, tell me your venue (tented? open-air? pavilion?) and guest count — I’ll sketch a short, itemized lighting plan you can hand to a rental house.