
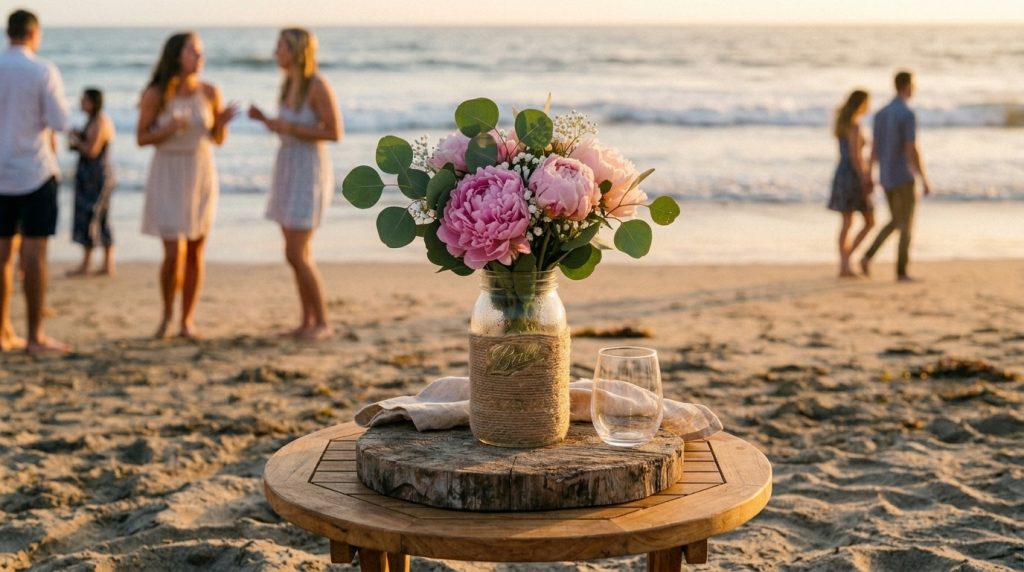
How to make simple wedding centerpieces was the first thing I googled when my sister told me she wanted a barefoot ceremony on the Cape.
We made all the centerpieces for 25 guests for under $250. I’ll show you exactly what we used, where we bought it (Trader Joe’s, Costco, Amazon), and the quick tricks that made cheap blooms read seaside-luxe.
This look suits boho coastal, barefoot-luxury, and small destination ceremonies.
Think $200–$1,200 for core table décor depending on scale. I recommend this approach for micro-weddings, elopements, and couples who want pretty tables without hiring a florist.
Lately I’ve noticed couples favoring weatherproof textures — driftwood, jute, and glass — over delicate white-only palettes.
1. Set the Scene: Ceremony Arch and Aisle Styling
You don’t need a florist to make the aisle feel intentional.
We used two large galvanized buckets of grocery-store greenery to frame the arch and let them do double duty as recycleable centerpieces after the ceremony.
Step-by-step:
- Place one bucket at each side of the arch and anchor with sand-filled zip bags.
- Tuck long grasses, palm fronds, and eucalyptus in first to create height and movement.
- Add bold grocery-store blooms (protea, sunflowers, or peonies) in clusters of three for focal points.
What to buy:
- Two galvanized buckets ($15 each from Home Depot).
- Eucalyptus bunches (Trader Joe’s $3–$8 each).
- One or two statement blooms per bucket (Costco peony or sunflower bunch, around $12–$25).
- Sand bags or heavy stones to anchor ($5–$10).
Why it works:
- Texture reads better than perfect petals in wind. The arch becomes a photo-friendly backdrop that doubles as décor for cocktail hour.
Ugly truth: wind will topple lightweight vases.
Fix: use heavier containers and anchor them in sand.
2. Layer Texture with Coastal Table Décor
Result: Tables that look curated, not cluttered. You’ll get that “magazine” feel without the florist markup.
Step-by-step:
- Start with a runner of loose greenery (eucalyptus or seeded eucalyptus).
- Place a driftwood slice or slate tile as the base for each centerpiece.
- Use 1–3 mason jars per table: one taller with stems, one short jam jar with a single bloom, and a tiny votive for candles.
What to buy (easy sources + Amazon):
- Mason jars (12-pack 16 oz mason jars — available on Amazon; affiliate tag: theoceanvows).
- Driftwood slices or wood rounds (I found mine at Michaels, $4–$12 each).
- Votives and LED tealights (I bought battery votives on Amazon — theoceanvows).
- Greenery bunches (Trader Joe’s $3–$8) and mixed flower bouquets (Whole Foods/Costco).
Sizing guide:
- Rectangular tables: one larger arrangement every 4–6 feet + scattered votives.
- Round tables (60″): three small jars grouped on a 10–12″ wood round.
Ugly truth: grocery bouquets vary wildly in quality.
Fix: open flowers 48 hours early, re-cut stems, and let them hydrate in cool water.
3. Dress for Sand and Wind: Bridal Look Essentials
Flowers sit on the table, but the bridal bouquet and boutonnières are part of the centerpiece story.
Step-by-step:
- Choose sturdier blooms for the bouquet (ranunculus, garden roses, anemone, protea, or sunflowers).
- Add seaside texture: dried palm, seagrass, or preserved ruscus.
- For boutonnieres, use a small sprig of greenery with a tiny fresh bloom and a dab of floral tape.
What to buy:
- Boutonniere pins and floral tape (Michaels or Amazon — theoceanvows).
- Ribbon in linen or jute (I used 1.5″ linen ribbon from Amazon — theoceanvows).
Why it works:
- Tougher blooms survive photos in wind and heat. The bouquet echoing table textures ties the whole look together.
Ugly truth: delicate flowers wilt in sun and salt air fast.
Fix: keep bouquets in a shaded cooler and mist lightly before photos.
4. Finish with Florals, Favors, and Final Details
This is where everything feels cohesive. Small choices make big impact.
Step-by-step:
- Scatter a few loose petals or tiny shells around each centerpiece for a beach-specific touch.
- Use printed cards for table numbers printed on textured cardstock and place in a shell or small driftwood holder.
- Re-use ceremony greenery on buffet and cocktail tables to stretch the budget.
What to buy:
- Small shells and ropes (local coastal shop or Etsy).
- Cardstock and mini easels (Amazon — theoceanvows).
- Floral food packets (keep stems fed during the day).
Unique angle:
- Turn leftover grocery-stores bouquets into welcome-table arrangements and guest book vases for the next day. Low-waste and photogenic.
Ugly truth: Pinterest setups often ignore logistics (heat, sun, cleanup).
Fix: test one full centerpiece a week before as a trial in the actual weather.
Quick shopping cheat-sheet
- Trader Joe’s: best for budget greenery and inexpensive blooms.
- Costco/Whole Foods: larger bunches, good value for peonies and roses.
- Walmart/Local grocer: fillers and seasonal color.
- Amazon (affiliate theoceanvows): mason jars, votives, floral tape, linen ribbon.
Conclusion — Do this one weekend
Buy the flowers two days before, assemble jars the day before, and do final styling the morning of in shaded staging.
You’ll save money, avoid florists’ delivery drama, and get centerpieces that actually last through portraits, dinner, and sunset toasts.
If you want, I can send a printable shopping list (by guest count) and a photo-based assembly guide I used for my sister’s beach wedding.