
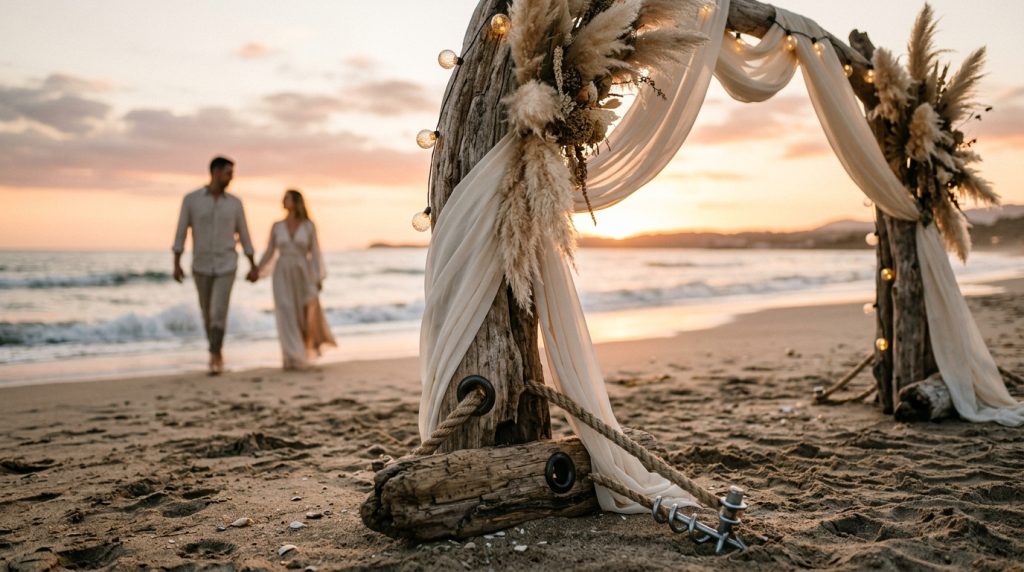
Here’s how to diy wedding backdrop that actually looks good in every lighting setup — midday sun, overcast gray, or golden hour glow. I pulled this off for my sister’s 40-person beach wedding on a $300 décor budget, and I’ll show you the exact pieces and tricks.
You’ll learn: the right materials, sizes, lighting tweaks, and a simple plan for wind-proofing. Budget range: about $200–$1,200 depending on scale (elopement vs. micro wedding).
The vibe I target most: barefoot luxury with a coastal-boho spin — think driftwood, soft linens, and a neutral palette with a coral accent. It fits intimate elopements and small beach receptions. Lately I’ve noticed couples leaning away from perfect white arches toward textured, weathered materials that read on camera no matter the sky.
1. Set the Scene: Ceremony Arch and Aisle Styling
Build a frame that won’t blow apart at high tide. My go-to is an 8–10 ft driftwood or faux driftwood arch for 50 guests; 6–7 ft feels right for elopements.
Materials I used: premade wooden arch (Amazon/etsy), 6-ft threaded sand anchors (Home Depot also stocks them), heavy-duty zip ties, and a 3-in-1 grommet kit. Total: about $120–$350 for the arch + anchors.
How to make it photogenic in any light:
- Choose matte, weathered wood over glossy white. Bright whites blow out in noon sun; textured neutrals add depth.
- Drape two layers: a slightly sheer chiffon for movement + a denser muslin panel behind to catch shadow. Use grommets and carabiners so fabric hangs straight.
- Anchor well. Sand stakes + hidden rebar or sand anchors = no catastrophic flyaways.
- Add asymmetry: cluster pampas, dried palms, and a single coral bloom on one side for scale.
Pro tip: position the arch so the ocean is slightly off-center. Front-lit ocean looks flat; backlit sun at golden hour gives dimension without overexposing faces.
2. Layer Texture with Coastal Table Décor
Tables are the backdrop’s supporting cast. The fabrics and table runners should complement, not compete.
Start with linen tablecloths in warm beige or driftwood gray. Add a narrow hand-loomed runner (jute or soft macramé) for texture. Scatter shells, smoothed sea glass, and one or two low arrangements of dried grasses.
Sizing rule: for a sweetheart table, a 6–8 ft backdrop width keeps the couple framed without swallowing them. For guest tables, 2/3 the table length in runner looks intentional.
Lighting here matters: candles are romantic but melt in heat. Use LED candles in hurricane glasses to get the glow without the risk. I bought battery-operated flicker candles from Amazon (affiliate tag theoceanvows) that lasted the whole evening.
3. Dress for Sand and Wind: Bridal Look Essentials
The backdrop only looks good if the couple doesn’t look like they fought a sandstorm.
Ugly truths: long trains drag sand. Full tulle looks like clouds one minute and limp the next in humidity. Heavy beading + ocean humidity = uncomfortable bride.
What I recommend:
- Choose crepe or lightweight chiffon gowns with a short train or bustle option.
- Shoes: barefoot sandals for the beach, wedge espadrilles for aisle stability.
- Fasten hair with hidden combs + extra bobby pins. Wind loves loose hairstyles.
- Keep the bouquet compact and slightly weighted at the base so it won’t sag or catch the wind like a sail.
4. Light It Right: Lighting and Photo-Proof Backdrops
Lighting can make or break your backdrop. I plan for three conditions: bright sun, overcast, and dusk.
For midday:
- Add a soft fill (portable reflector propped behind the officiant) to avoid shadows on faces.
- Use matte fabrics so highlights don’t blow out.
For overcast:
- Lean into color. Add one coral or terracotta accent so the backdrop reads warm on camera.
For dusk:
- Layer string lights, tiny LED uplights, and warm-pinspot behind the arch for a halo effect. A single warm uplight behind the muslin panel turns a neutral backdrop into a glowing frame without harsh shadows.
Practical kit: battery-powered LED uplights (cheap on Amazon), a spool of warm white 3000K string lights, and 2 collapsible reflectors.
5. Finish with Florals, Favors, and Final Details
Small finishes keep the backdrop believable and luxe.
Flowers: mix fresh and dried (pampas, bleached palms, seed pods). Dried elements survive heat and still photograph well at any hour.
Favors and signage: use driftwood signs with burnt-ink calligraphy for directions, and place shell place cards at the aisle ends.
I found shell place cards at a coastal home store during a summer sale — they cost $3 each but read like a custom touch. Little details like that add up visually.
Ugly Truths: What Pinterest Won’t Tell You
- White fabric disappears in bright sun. It creates flat photos.
- String lights alone are invisible till dark. Use them with uplights or lanterns.
- Backdrops look tiny on camera if you don’t scale them to the couple and guest count.
Quick shopping notes (where I actually bought things):
- Driftwood arch kit — Etsy (handmade) or Amazon arch kits for budget.
- Sand anchors — Home Depot or Amazon (buy heavy-duty).
- LED Uplights & battery candles — Amazon (affiliate tag theoceanvows).
- Dried pampas & palms — local florists or wholesale shops (Michaels, bulk online sellers).
Final thought: The trick is contrast. A backdrop that reads well in every light balances texture, color, and a little structural weight. Spend your money on the frame and lighting. Save on filler pieces you can DIY or source locally.
If you want, I can send a printable shopping list (with exact Amazon product names and estimated prices using my theoceanvows tag) tailored to your guest count and desired look. Which size are you planning for — elopement or 30+ guests?