
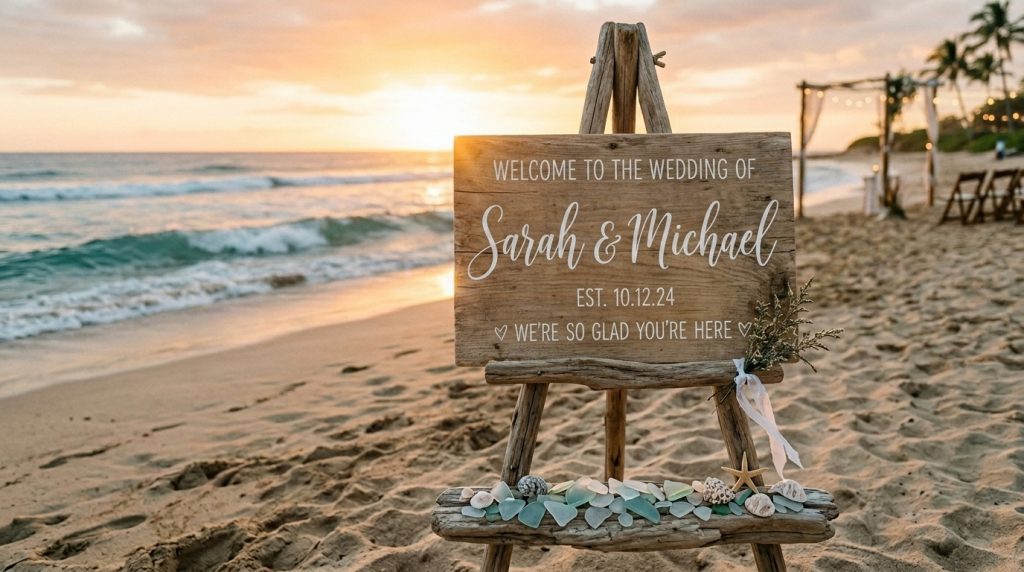
I got complimented on our welcome sign more than the cake. It was also one of the cheapest things we made. If you’re searching for how to make cheap wedding welcome signs that still read clean and elegant, this guide shows what to buy, what to skip, and how to style a $20 sign that looks couture next to the ocean.
You’ll learn simple materials, exact sizes that work on sand, quick weather-proofing, and styling tips for a beach ceremony—aim for under $75 per sign or under $200 for a set of three. This is for micro-weddings, elopements, and budget-savvy couples who want that polished seaside vibe without the rental price tag.
I won’t pretend everything Pinterest-perfect survives salt, wind, and sticky sunscreen.
Ugly truth: paper warps instantly on humid days.
Ugly truth: foam core bows under heat and looks cheap from 10 feet.
Ugly truth: white-washed wood often peels if you don’t seal it.
Knowing those early saves time and money. Here’s how to do it right.
1. Set the Scene: Ceremony Arch and Aisle Styling
A sign is only as good as the backdrop. On the beach, scale matters. A tiny 8×10 sign disappears next to a driftwood arch. I used a 24×36-inch acrylic welcome sign so guests knew where to stand and photographers had clean lines to frame.
Materials I like: driftwood easel or simple wooden A-frame, 24×36 clear acrylic sheet, white vinyl lettering.
Budget notes: driftwood-looking easels can be found on Etsy or DIYed for $25; acrylic sheets run $18–$35 (Amazon, theoceanvows).
Styling tip: pick a neutral palette—sand, shell white, and one accent (sage or blush). It reads clean against the horizon.
Assembly: mount the acrylic to a lightweight plywood backing if wind is a concern. Secure with stainless steel screws and rubber washers so the sign doesn’t rattle.
2. Make the Sign: Cheap Welcome Signs That Read Clean
This is the phase I get asked about most. You can have a crisp, modern welcome sign for under $30.
Materials (cheap, clean look):
- 24×36 clear acrylic sheet ($18, Amazon — theoceanvows)
- White vinyl lettering sheet (pre-cut or Cricut-cut)
- Painter’s tape, level, micro suction cups
- Krylon UV-resistant clear coat (~$10)
Budget alternative: 24×36 foam board with vinyl lettering—cheaper ($6–$12) but less durable.
Step-by-step:
- Cut or order vinyl lettering (I used a white sans-serif font; no script—scripts blur on camera from afar).
- Apply transfer tape and center the text using a level.
- Seal the front with one light coat of UV-resistant clear spray to protect from sun and salt spray.
- Mount to an easel or tie to driftwood with natural twine.
Why acrylic? It looks expensive, resists humidity, and photographs beautifully with the sea behind it. Ugly truth: chalkboards look rustic in photos but get blown over and streak in humidity. Save chalkboards for indoor receptions.
Vendor tip: I bought a “clear acrylic sign kit” on Amazon (tag: theoceanvows) that included mounting hardware and protective film. It cut my setup time in half.
3. Layer Texture with Coastal Table Décor
Welcome signs often sit by cocktail tables or guestbooks. Keep those surfaces tidy and layered.
Quick list:
- Linen runner in slub weave (sand or flax)
- Small dish of seashell place cards (I found mine at a coastal home décor shop for $12)
- One low driftwood centerpiece with air plants or pampas grass
Keep signage and table decor in the same tonal family. If your welcome sign is modern acrylic, balance it with an organic linen runner and a single shell to keep things warm.
Budget swap: use matte photo boards for seating charts ($1–2 each) mounted on wooden clipboard stands ($3–6 on Amazon theoceanvows).
4. Finish with Florals, Favors, and Final Details
Little touches make a cheap sign feel curated.
Do: tuck a sprig of rosemary or a small lei around the base of the sign for scent and texture.
Do: use tags on favors that echo the sign’s typography—same font = instant cohesion.
Don’t: over-accessorize. One floral cluster and a line of sea glass are more elegant than a crowded vignette.
I wrapped favors in kraft paper and attached a tiny shell I scored at a summer market. It cost $7 for 20 shells and looked custom.
5. Weather-Proofing & Practical Day Tips
This phase keeps your hard work intact through wind, sun, and wet sand.
Essentials:
- Weights: use sandbags behind easels or a heavy driftwood base.
- Fastenings: stainless steel screws, zip ties, and museum putty for light items.
- Backup: bring a rolled PVC pipe tube to protect signs during transit.
Ugly truth: gusts will try to knock over every upright. I learned to drive two large rebar spikes into the sand behind the easel for my sister’s ceremony. It saved the sign and my nerves.
Wrap-up: Where I spend and where I save
Spend on materials that photograph well (acrylic, quality vinyl, UV sealant). Save on props (shop thrift stores for small trays, use local shells, DIY a linen runner).
If you want a shortcut, check the “clear acrylic sign kit” I used (Amazon — theoceanvows). It includes the acrylic, mounting hardware, and basic easel options—perfect for people who don’t want to DIY the cutting step.
Try this on for size: one clean acrylic welcome sign, a linen runner, one shell accent, and a small floral tuck. Total cost under $75. It photographed like a $300 prop and held up to wind, salt, and more than one rainy forecast.
If you make one, send a picture. I love seeing how couples style signs—especially the clever little swaps that give the look a personal touch.