
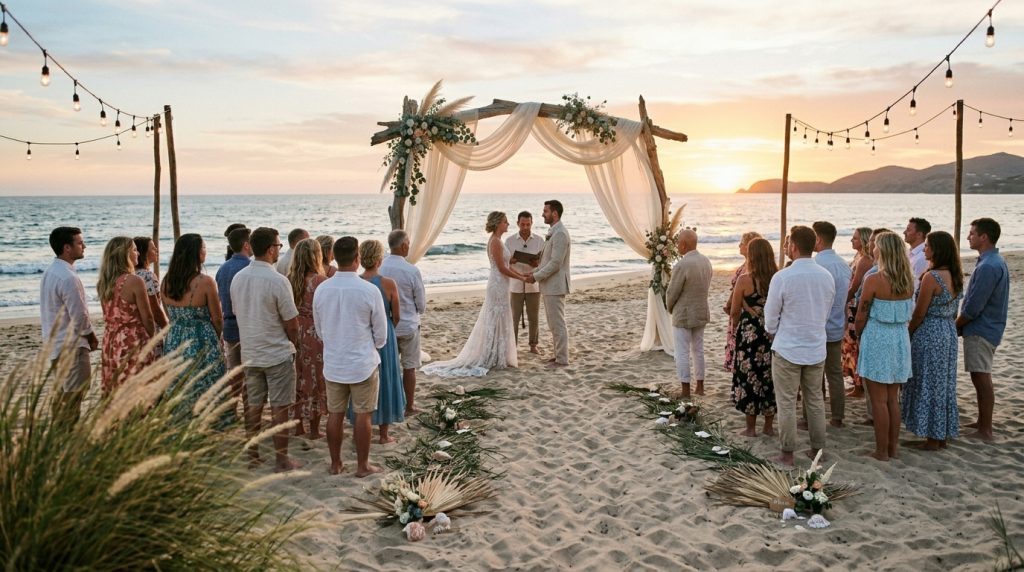
How to DIY wedding decor that looks custom, not craft-store cheap: I learned this the hard way when my cousin’s ceremony looked like a garage sale under a Pinterest filter. The trick is simple—focus on three things that read expensive from a distance: shape, texture, and anchor.
You’ll finish with a cohesive beach look for about $500–$1,500 for core décor (I did mine for $760). This guide fits intimate elopements, micro-weddings, and budget-conscious beach days. I’ll show you exact materials, ugly truths, and what to buy (Amazon picks under the affiliate tag theoceanvows).
I’ve noticed couples moving toward barefoot-luxury and driftwood installations instead of the same white arches. That’s the vibe here: coastal boho with neutral tones, dried florals, seagrass, and lantern lighting.
Ugly truths you need to accept
- Wind ruins unweighted fabric and flops flimsy ribbons into a mess.
- Cheap acrylic signs read like costume jewelry from a distance—matte or wood looks cleaner.
- Tiny vases everywhere look charming in photos but get swallowed by ocean light. Bigger groups of fewer pieces read better.
1. Set the Scene: Ceremony Arch and Aisle Styling
Start with a strong silhouette. A simple driftwood frame or a DIY reclaimed-wood arch creates the line your eye follows in photos.
I built a driftwood arch from two 8-ft poles screwed into 2×4 bases. I wrapped the joints with jute rope and anchored with sandbags hidden under woven baskets. Use sheer, 54-inch wide fabric panels (I used 3 yards per side) and pin discreetly with small brass clips so wind doesn’t tear seams.
For the aisle, skip individual chair décor. Lay a 2-3 ft seagrass runner down the center, scatter larger shells every 6 feet, and place lanterns on weighted bases (battery candles inside). From 20 feet, the scene reads curated, not cluttered.
Product notes: look for seagrass runners and brass clips on Amazon (tag: theoceanvows). I bought 6 LED hurricane lanterns for $45 and they held up in gusts.
2. Layer Texture with Coastal Table Décor
Flat color looks flat on sand. Layer texture: raw linen runners over rattan chargers, then a mix of matte ceramic plates.
Groupings sell the look. Make three centerpiece vignettes per 6-ft table instead of a long string of tiny vases. Use one low ceramic bowl with dried palm fronds, one trio of bud vases with single stems, and one sculptural candle cluster.
Ugly truth: white linens show sand instantly. Go neutral—oat, flax, or soft tan. They hide grit and photograph warmly.
Quick DIY trick: distress wood candle holders with sandpaper and a whitewash. These read like boutique rentals but cost $12 each in materials.
3. Dress for Sand and Wind: Bridal Look Essentials
No cathedral trains on loose-packed sand. Choose fabrics that move, not float—crepe, soft satin, or a lightweight chiffon with a defined hem works best.
Bring double-sided fashion tape, emergency hem weights, and neutral-tone sandals. I pinned my veil to a small comb and anchored it with micro elastic to avoid it flipping in full gusts.
For the groom and party: linen blends look sharp and breathe. Skip full tuxedos unless you have a windbreak plan.
4. Finish with Florals, Favors, and Final Details
Dried florals and locally foraged greenery read expensive and survive heat and salt. I used bleached palm leaves, Italian ruscus, and bunny tails for texture. Use floral chicken wire inside low vessels to lock stems; it’s cheaper and lasts longer than soaked foam.
Favors that double as decor are gold. Small amber bottles of local salt, wrapped with kraft tags, looked thoughtful on each place setting (I found similar bottles at a coastal home décor shop during a summer sale for $0.90 each).
Ugly truth: fresh delicate blooms wilt fast. If you insist on roses, plan them for the ceremony only and swap to dried table florals for reception.
5. Light It Like a Pro: Ambience That Holds Up
Lighting makes evening photos. String LED bistro lights in a zig-zag pattern for even coverage. Add battery-powered glass votives down the aisle (LED tealights with flicker) and tiki-style torches at perimeter points.
Wind tip: use weighted bases for poles and lanterns. I tied lightweight tablecloths under the table edge with binder clips—unseen, inexpensive, and stops the cloth from ballooning.
Unique angle: rent or DIY a low arch-mounted up-light for sunset. It creates a cinematic wash without needing riggers.
Shopping checklist (what I actually bought)
- Seagrass table runner (Amazon — theoceanvows)
- LED hurricane lanterns, battery tealights (Amazon — theoceanvows)
- Raw linen runners, rattan chargers (local home shop + Amazon)
- Driftwood poles or reclaimed 8-ft lumber, jute rope
- Dried palm leaves, bunny tails, Italian ruscus (wholesale floral or Etsy)
- Weighted bases / sandbags, brass clips, binder clips
Three quick staging rules that save looks
- Simplify shapes. One strong arch beat three small props.
- Up-size your vessels. Bigger items photograph better.
- Weight everything. Wind is your biggest stylist.
Final note: small details matter, but only if the big shapes are right. Spend on silhouette and texture first, then the pretty extras. If you want my exact Amazon picks I used (and where I saved vs. splurged), I can list them with the affiliate tag theoceanvows so you can shop exactly what worked on my wedding day.