
I learned how to decorate a wedding on a budget the hard way—after blowing $700 on a rented arch that flipped in the wind.
You’ll get a luxe-looking seaside setup for roughly $500–$1,500 in core décor if you prioritize the right pieces and skip the Pinterest extras.
Expect practical takeaways: what to splurge on, what to DIY, and a realistic budget breakdown you can reuse for any shoreline vibe.
This guide is best for intimate elopements, micro-weddings, and couples who want barefoot luxury without the price tag.
Think minimalist shoreline or boho coastal in sand, driftwood gray, and seafoam green tones. Lately I’ve noticed couples leaning toward dried florals and natural textures instead of all-white formal setups—fewer rentals, more longevity.
1. Set the Scene: Ceremony Arch and Aisle Styling
Result: a photo-ready focal point that won’t blow away.
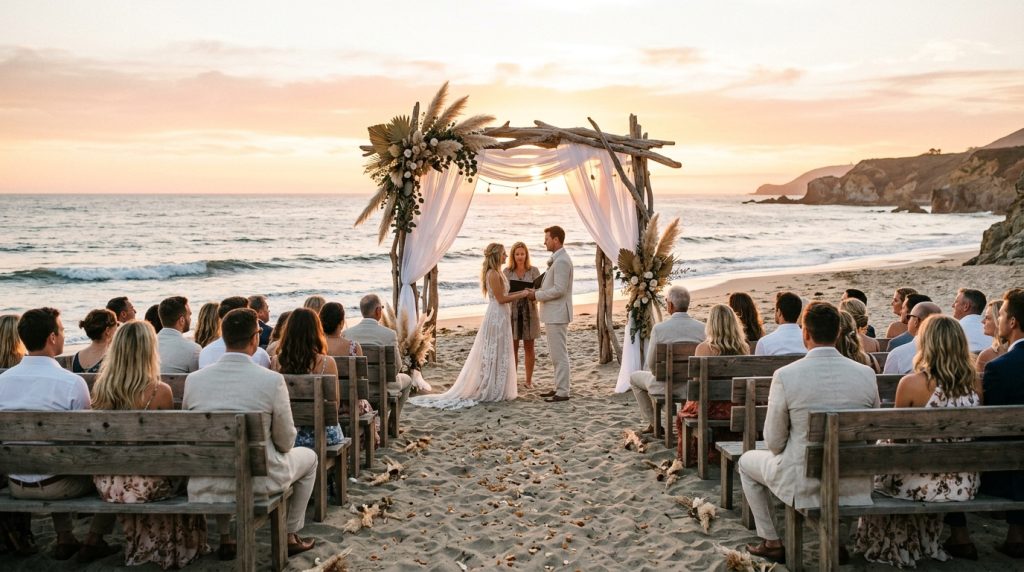
Skip the heavy rental arches. Ugly truth: lightweight white rental arches act like sails. I ditched one and built a 8–10 ft driftwood frame for $40 using found wood and a handful of screws.
Drape two panels of chiffon (5–8 ft each) instead of a full fabric wrap. Chiffon reads luxe but breathes in wind. Anchor with buried PVC bases or sandbags hidden under a woven basket.
Line the aisle with repeated elements—three small clusters of shells + a 10” glass hurricane and faux eucalyptus on each side. Repetition reads intentional and upscale; random pieces look like leftovers.
Pro tip: if you need battery candles or hurricane glass, I used affordable options from Amazon (search “led hurricane candles” here: https://www.amazon.com/s?k=led+hurricane+candles&tag=theoceanvows). They survive wind and don’t melt on hot afternoons.
2. Layer Texture with Coastal Table Décor
Result: tables that feel curated and calm, not cluttered.
Start with a neutral linen runner in sand or seafoam. Linen napkins (20×20”) in muted aqua tie the look together. I picked up a pack of linen-look napkins for about $25 and they instantly made cheap folding chairs feel intentional.
Centerpieces: choose one focal element per table—either a 6” cluster of dried flowers/pampas grass or three graduated glass hurricanes. Fill vases with sea glass or sand from a craft store instead of florals you’ll have to water.
Ugly truth: too many small items look cheap. Keep to 3 repeated items per table and use texture (rope placemats, seagrass chargers) to add richness.
For affordable lighting, warm string lights add instant glow (search “warm white string lights” here: https://www.amazon.com/s?k=warm+white+string+lights&tag=theoceanvows). They’re cheaper than chandeliers and photograph well at dusk.
3. Dress for Sand and Wind: Bridal Look Essentials
Result: a bridal aesthetic that reads romantic but actually behaves on the beach.
Choose breathable fabrics—linen, lightweight crepe, or chiffon skirts. I swapped a heavy bustle for a detachable short train that clipped off before the reception.
Shoes: block heels or embellished sandals photographed beautifully and saved me from sinking into the sand. I found neutral block-heel sandals for under $50 that looked custom.
Ugly truths: veils rarely survive real ocean breezes. Long trains drag and collect sand. Save money by renting a fancier veil for portraits or using hair combs and fresh florals for the ceremony.
Groom tip: skip tuxedos. A lightweight linen suit or rolled sleeves in a neutral palette looks timeless and keeps everyone comfortable.
4. Finish with Florals, Favors, and Final Details
Result: small details that feel intentional and elevate the whole event.
Dried florals and pampas grass are the biggest budget win I discovered. They photograph like fresh flowers, don’t wilt in heat, and you can buy in bulk for under $100 for several arrangements.
Favors: small jars of local sea salt, tiny succulents, or shell place cards feel coastal and cost-effective. I scored shell place cards at a coastal home décor shop during a summer sale for about $1.25 each—instant charm.
Lighting & final polish: battery-operated tea lights in clusters and lanterns line walkways. Assign one volunteer to re-light or reposition items between ceremony and reception so nothing looks messy in photos.
5. Rentals, Thrift Finds, and Where to Save
Result: a pro-level setup without pro-level prices.
Rent big-ticket basics—tables, chairs, linens—so you don’t waste budget on things you’ll only use once. Save on décor: thrift glassware, shop clearance at home stores, and hit local craft shops for bulk shells and rope.
Ugly truth: trying to DIY everything eats time and often costs more. Focus DIY on repeat pieces (signage, place cards) and outsource heavy lifting (delivery, set-up) if your venue requires it.
Quick Budget Cheat-Sheet (example for 40 guests)
- Ceremony focal pieces (arch + fabric + anchors): $50–$250
- Tables + chairs rental: $300–$700 (worth the spend)
- Table décor (napkins, runners, candles): $150–$300
- Florals (dried + small bouquets): $75–$250
- Lighting & extras: $50–$200
Final notes: test everything once on-site. Put your arch up at least an hour before the ceremony to see how it looks in wind and light. Pack a repair kit (zip ties, safety pins, extra rope). Assign one friend to be the “decor wrangler” so last-minute fixes don’t become your problem.
If you want, I can draft a shopping checklist with exact Amazon product picks I used (napkin sizes, LED candle pack links, and my favorite sandals) and price it out for your guest count. Would that help?