
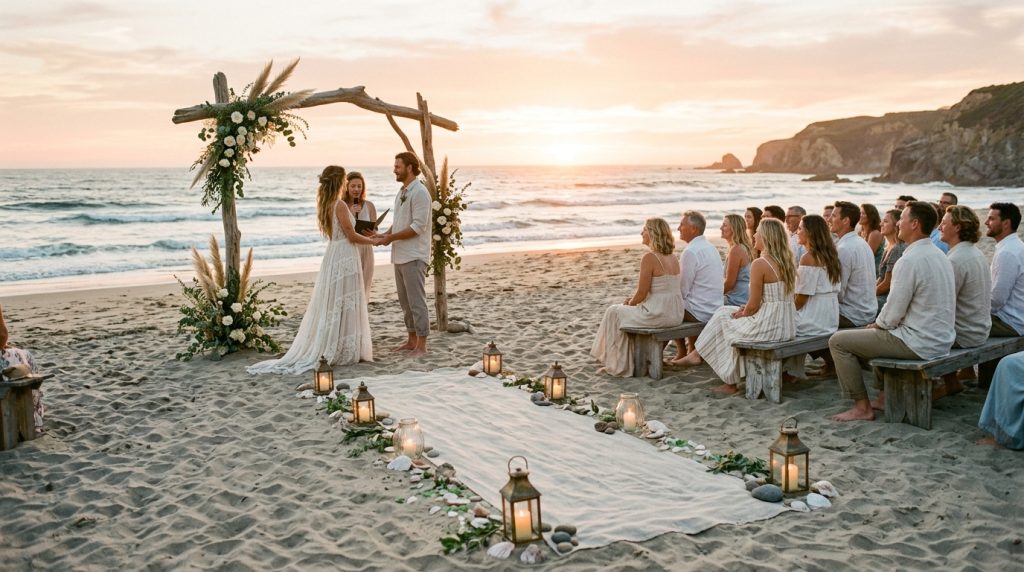
How to decorate a wedding venue without making it feel cluttered was the lesson I learned the hard way when my cousin’s rehearsal dinner looked like a seaside thrift store. We had beautiful pieces. Too many of them. The day felt busy, not intentional.
You’ll learn practical swaps, exact items I’ve used, and a realistic budget (about $500–$1,500 for core décor, depending on scale). These tips work for intimate elopements, micro-weddings, and anyone aiming for a calm, coastal look.
A quick note on vibe: aim for barefoot-luxury or minimalist shoreline. That means a muted palette (sand, oyster, driftwood gray, soft sage), natural textures, and plenty of negative space. Lately I’ve noticed couples favoring low installations over tall, busy arches — it reads cleaner against the horizon.
1. Set the Scene: Ceremony Arch and Aisle Styling
The result: a single focal point that reads from the road to the water.
Pick one statement — an arch, a driftwood installation, or a low floral crescent — and resist adding competing pieces down the aisle. I used a 7-ft driftwood arch from an Etsy maker (search “DriftwoodDreams arch”) for about $320. It photographed like heaven and needed only a simple eucalyptus garland.
For the aisle, choose either texture or décor, not both. If you use a linen runner (I like natural linen, 3–4 ft wide), keep aisle markers to low lanterns or a single cone of pampas grass every 6–8 feet. Too many lanterns + signs + petals = clutter.
Sizing tip: keep the arch proportionate to your guest count. For 30 guests, 6–8 ft wide and 7 ft tall is perfect. For 80+, go 8–10 ft wide.
2. Layer Texture with Coastal Table Décor
The result: tables that feel curated, not crowded.
Start with a neutral base — raw linen runners or a soft sand tablecloth. Layer 1 or 2 textures only: rattan chargers, a linen napkin, and a single centerpiece. My go-to centerpieces are low coral-colored protea or succulents in matte ceramic bowls (6–8 in diameter). They cost $18–$45 depending on the florist.
Keep centerpiece height under 10 inches to keep sightlines open. If you want height, do it sparingly — one tall statement (a 2–3 ft driftwood candlestick or lighthouse-style lantern) per long table instead of multiple tall pieces on every table.
Place settings: use shell place cards or small seagrass mats. I found shell place cards at a coastal home décor shop for $1.50 each and they added charm without noise.
Repeat elements in odd numbers (3s and 5s). Repetition ties the room together without adding visual weight.
3. Clear the Clutter: Common Mistakes That Make Venues Look Busy
Ugly truth #1: More is not better. You don’t win points for filling every surface.
Ugly truth #2: Mixing too many metals and colors creates visual noise. Stick to one metal (matte gold or brushed brass), one wood tone, and one neutral accent.
Ugly truth #3: Small signage everywhere equals clutter. Use one clear welcome sign and one directional sign. Skip table numbers if your seating is small — guests read the room faster than you think.
Nobody tells you that “more flowers” often hides poor composition. A handful of thoughtfully placed blooms reads luxe. A truckload reads chaotic.
If you’re tempted to DIY a hundred tiny jars, consider this: a regimented repeat of the same jar looks better than mismatched jars. Consistency is your friend.
4. Finish with Florals, Favors, and Final Details
The result: the little things feel intentional.
Florals should echo the palette and live texture, not overwhelm it. I used coastal blooms — sea lavender, eucalyptus, and a touch of coral ranunculus. For favors, pick one tactile item: a small jar of local salt, a mini sunscreen, or a seed packet. Keep packaging simple: kraft paper, a single wax stamp, and a tucked sprig.
Stationery: choose clear acrylic signs for the bar or menu. An acrylic sign cleans visual clutter because it reads but doesn’t compete.
Small detail I love: woven place mats under menus. They cost $2–$4 each and anchor the plate without shouting.
5. Light It Right: Lighting and Flow for Uncluttered Spaces
The result: an evening that feels cozy, expansive, and intentional.
Lighting defines space without adding stuff. Use a handful of larger light sources — three oversized lanterns at the ceremony edge, strings of lights overhead in a single plane, or a row of LED bollard lamps — instead of scattering many tiny candles.
For beach weddings, battery-operated glass lanterns (I bought a pack of 6 LED glass lanterns on Amazon for about $45) are lifesavers in wind. If you want my quick product picks, I keep a curated Amazon shop here: https://www.amazon.com/shop/theoceanvows
Flow tip: create clear walkways and leave breathing room around seating and food stations. If guests can’t move easily, the space feels jammed, no matter how beautiful the décor.
Quick shopping notes (what I actually bought)
- Driftwood arch (Etsy maker “DriftwoodDreams”): ~$320.
- Natural linen runners (12×108 in): $18–$35 each on Amazon.
- LED glass lanterns, pack of 6: ~$45 (Amazon).
- Matte ceramic bowls for low centerpieces: $12–$30 each (Terrain/Anthropologie).
- Acrylic signage: $30–$60 (Etsy or Amazon).
Final truth: negative space is a styling choice. Leaving room around your pieces is just as intentional as the pieces themselves.
If you want my pared-down product list and layout plan, my Amazon storefront (affiliate) is here: https://www.amazon.com/shop/theoceanvows — I only list things I’ve used at real beach weddings.
Wrap-up: do less, choose one focal point per zone, and repeat simple elements. That’s how to decorate a wedding venue so the day feels calm, coastal, and unforgettable.