
The light at dusk turned a simple table into the most photographed moment of that Gulf Coast wedding. Coastal wedding reception ideas with soft blues and candlelit tables are what I reached for when my cousin wanted low-key elegance and weather-proof details. Here are 26 setups I have seen, built, or salvaged that make shorelines feel intentional, not improvised.
I cover boho to nautical, low-budget DIY to planner-level splurges, elopements to full receptions. Expect ideas that hold up in wind, tips that save time on permit runs, and a 2025 trend I keep spotting: preserved botanicals replacing fragile fresh bouquets.
1. Low Tide Long Table With Gauze Runners
Style: Airy Coastal | Difficulty: Moderate DIY | Best For: Small guest lists | Budget: $300 to $1,200
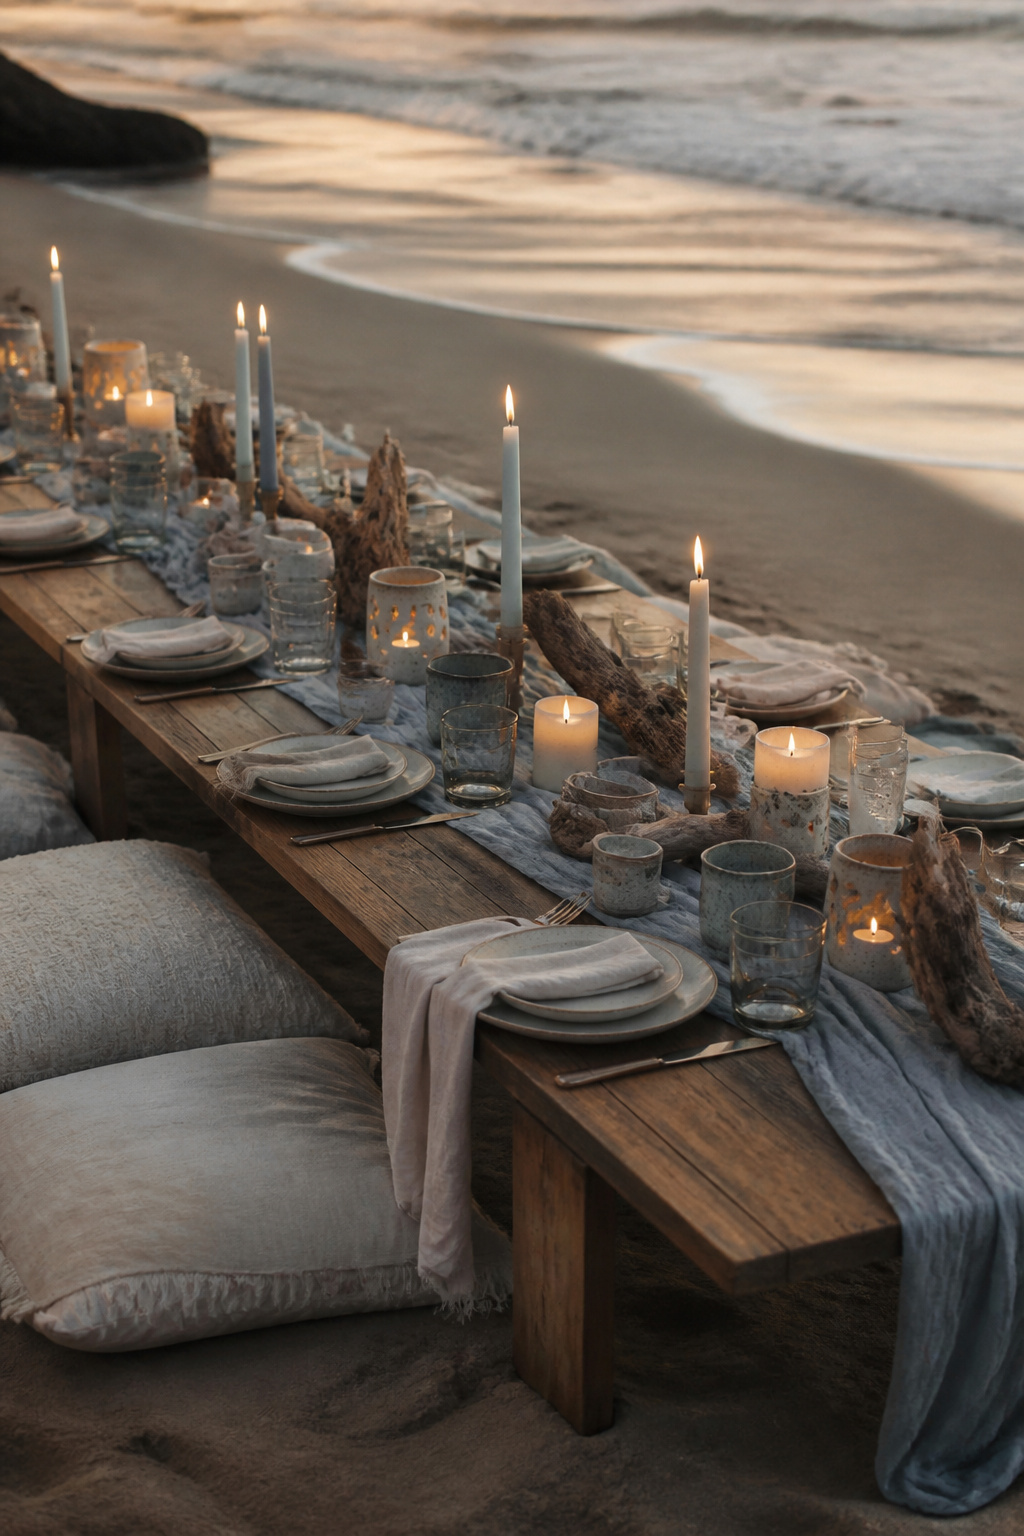
The light pooled at table level and guests kept turning to photograph the glow. Candles read clean against soft blue gauze, and the low profile keeps wind from flattening centerpieces.
What You Need:
- 1 reclaimed wood table, 8-12 ft long
- soft blue gauze runner, 2-3 yards per table
- 12-20 ceramic taper holders, varied heights
- battery-operated candle backups and sand-weighted anchors
Setup:
- Assemble table and secure legs on compacted sand 90 minutes before sunset.
- Lay gauze with natural wrinkles, pin corners with ceramic weights.
- Light real tapers 10 minutes before seating and keep backups lit in hurricane glasses for windy pockets.
2. Driftwood Arch Draped in Preserved Pampas
Style: Boho Coastal | Difficulty: Easy Rental | Best For: Ceremony backdrop & photo wall | Budget: $150 to $600
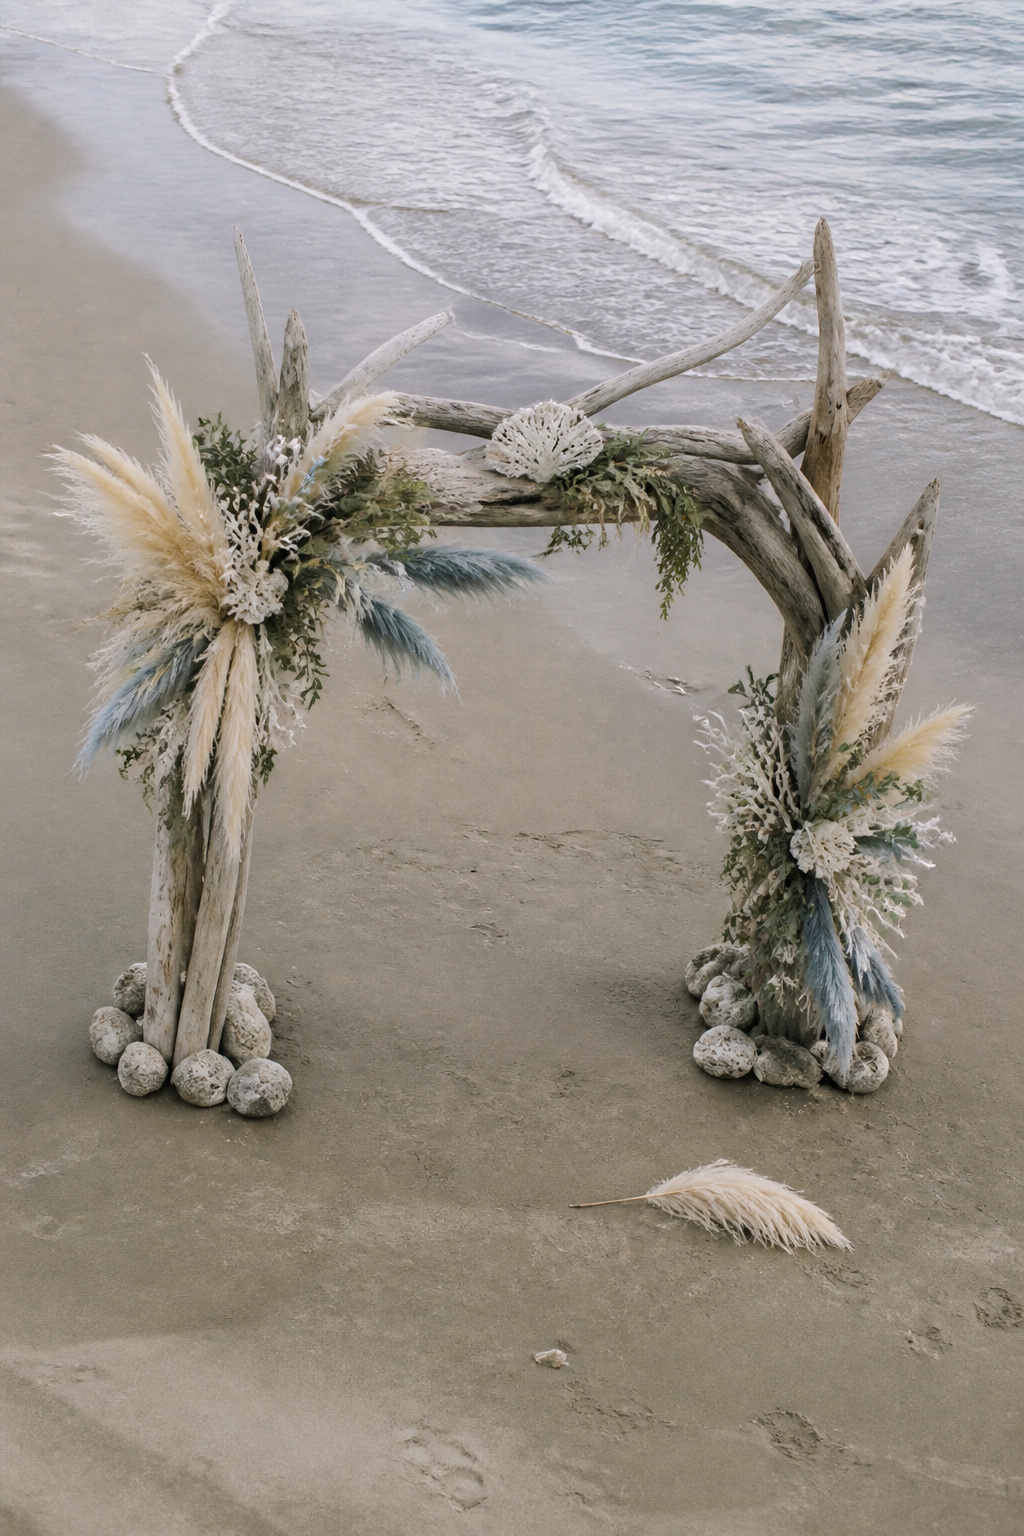
The textured driftwood reads editorial while preserved pampas keeps shape when the breeze picks up. I watched a couple say their vows here and everyone photographed the arch more than the couple for a minute.
What You Need:
- 7 ft reclaimed driftwood uprights, cross-beam
- preserved pampas bundles, bleached coral stems
- natural jute rope and zip ties
- sand anchors or screw-in ground stakes
Setup:
- Place arch at low tide line two hours before guest arrival.
- Secure bundles with jute wraps and hidden zip ties, tie to cross-beam.
- If wind gusts exceed 15 mph, remove top bundles and replace with low bowl arrangements.
3. Edison Bulb Canopy Over Low-Seating Tables
Style: Moody Cinematic | Difficulty: Pro Install | Best For: Sunset receptions | Budget: $800 to $3,000

The first time I saw amber bulbs strung over a low table the whole crowd quieted. The bulbs make the ocean recede into silhouette and the table feel like a living room under the sky.
What You Need:
- stringed Edison bulbs rated for outdoor use
- low wood tables, floor cushions or poufs
- woven seagrass runner, small terracotta bud vases
- battery packs or generator for bulbs
Setup:
- Install poles and string lights early, test power sources three hours before arrival.
- Place floor cushions with low tables and secure with non-slip pads.
- Start bulbs 30 minutes before seating for golden-hour transition; swap to warm LED if wind tosses flames.
4. Shell Place-Card Scatter With Sea-Glass Numbers
Style: Bright and Airy | Difficulty: Simple DIY | Best For: Casual receptions | Budget: $40 to $200
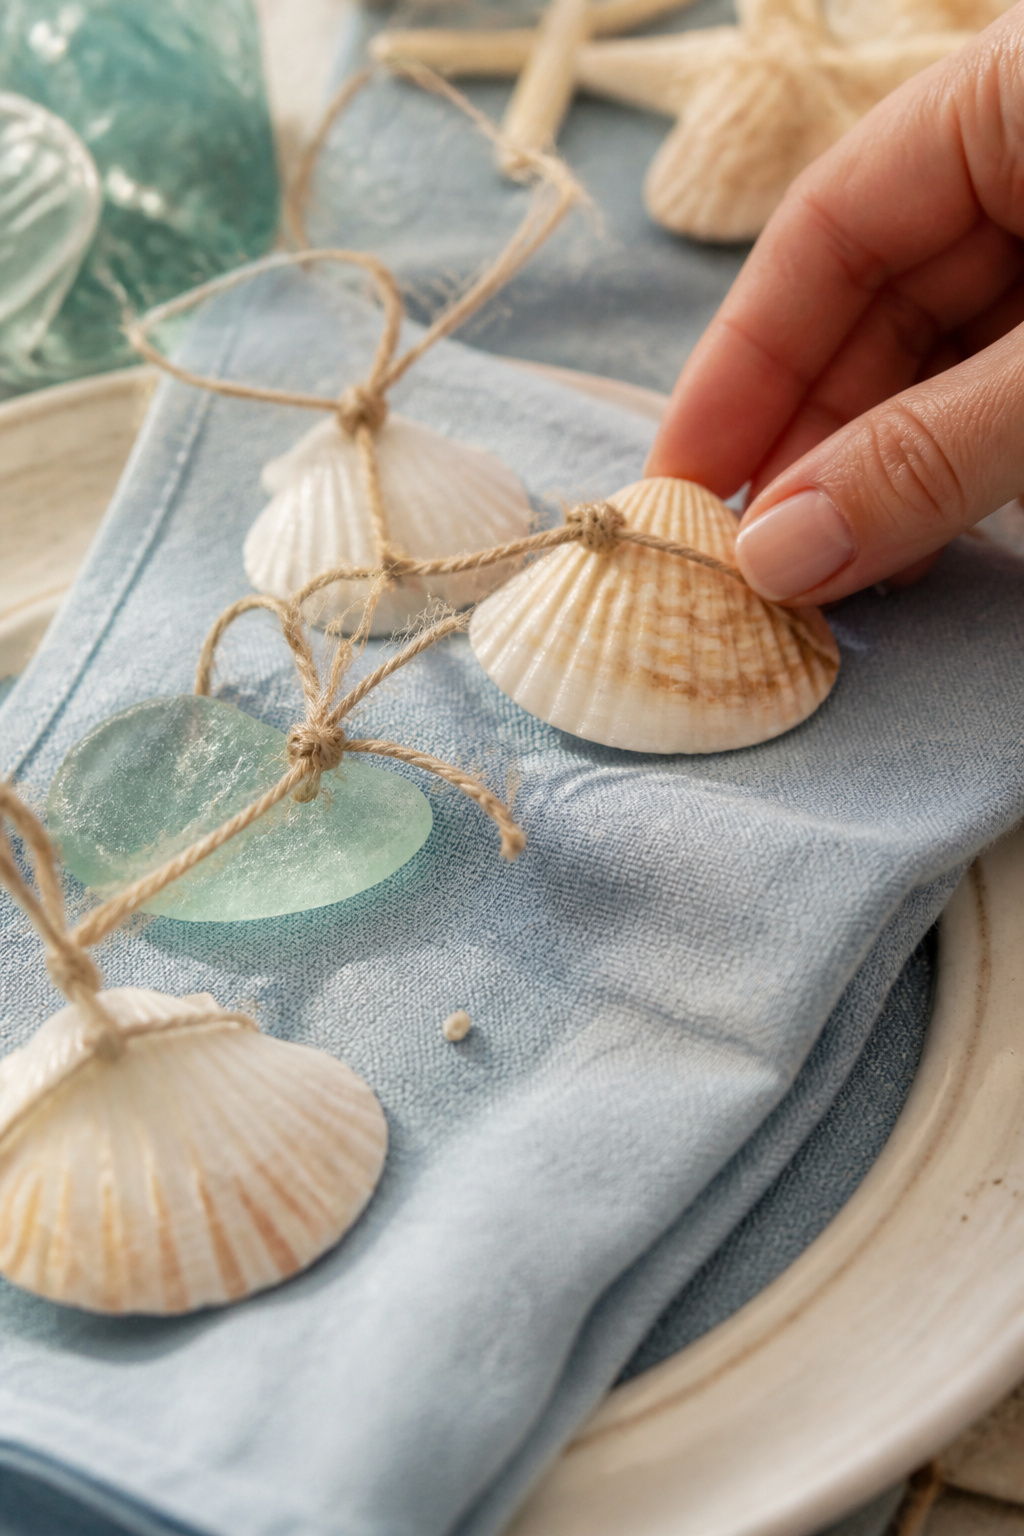
Guests loved picking their shell and brushing sand off the inside. Sea-glass numbers felt collected rather than manufactured.
What You Need:
- mixed shells, 2-3 per place
- small polished sea glass numbers, 1-10 sizes
- soft blue linen napkins
- fine silver permanent pen for names
Setup:
- Arrange napkins and place a shell cluster on each plate 45 minutes before seating.
- Set sea-glass numbers on small driftwood blocks to keep them from sliding.
- Tell your caterer about the scatter so nothing ends up in food; keep an alternate indoor set for gusty nights.
5. Candlelit Cocktail Cove With Low Lanterns
Style: Moody Cinematic | Difficulty: Easy Setup | Best For: Cocktail hour | Budget: $150 to $700
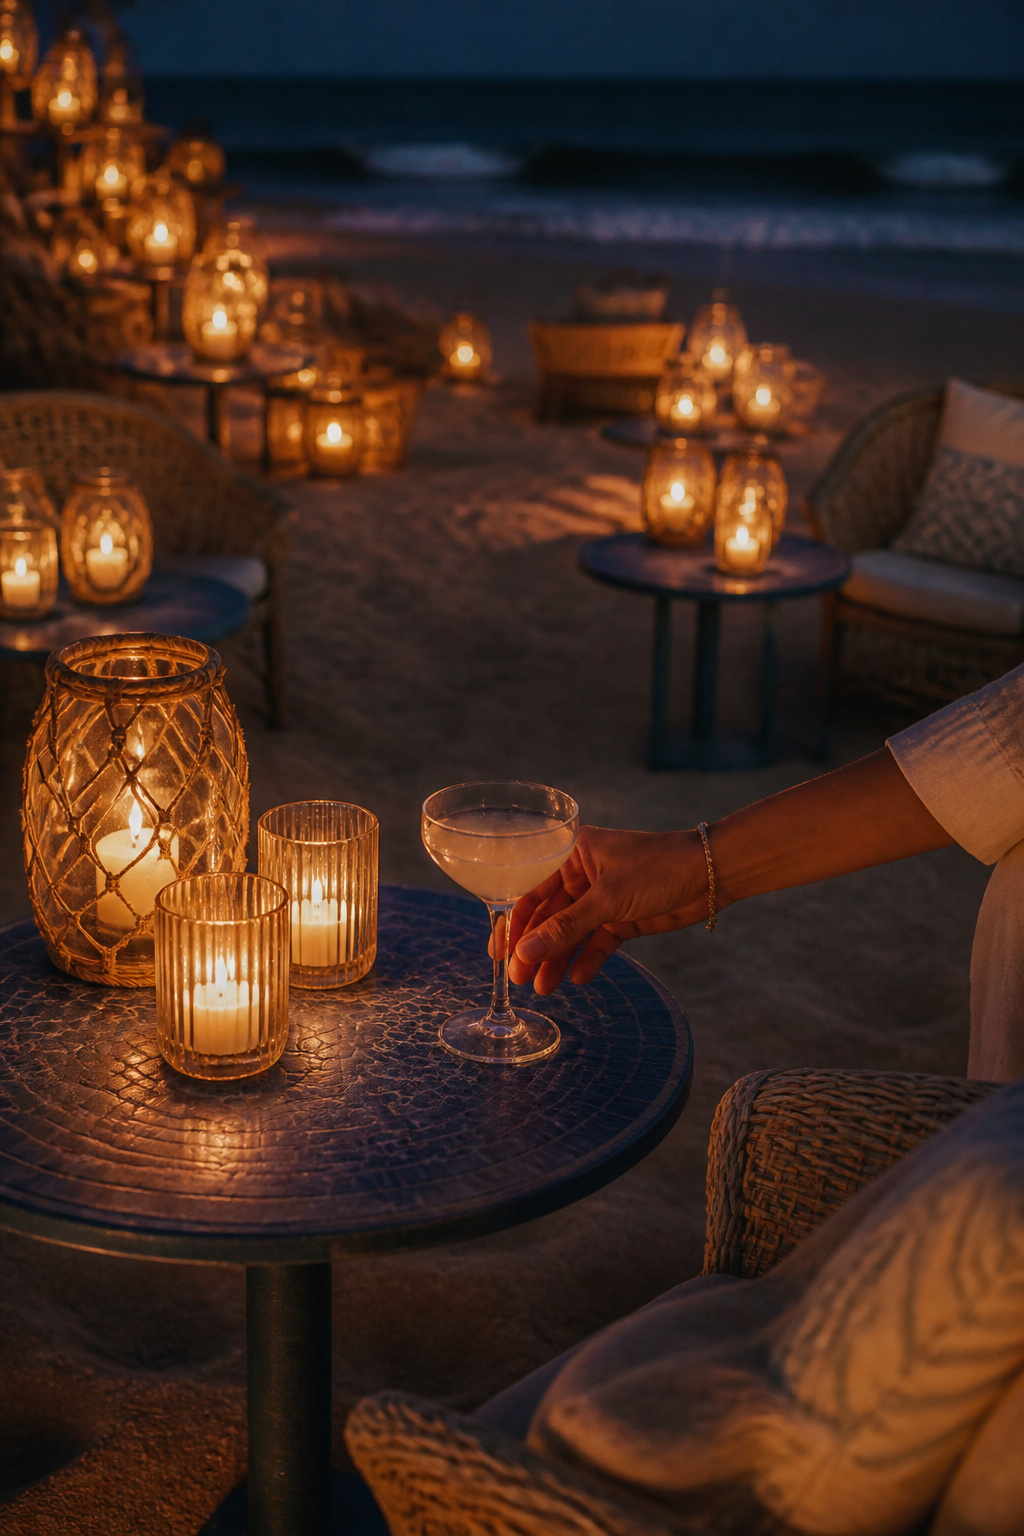
At a Cape Cod reception I watched guests drift to a lanterned cove and linger there all night. Low lanterns create pockets of intimacy without blocking views.
What You Need:
- 10-15 glass lanterns in varied heights
- citronella or enclosed candles, battery backups
- small cocktail tables painted in pale blue
- sand stabilization discs for lantern bases
Setup:
- Cluster lanterns in groups of three to five around cocktail zones two hours ahead.
- Use enclosed candles if bugs are a concern, light real flames 20 minutes before guests arrive.
- Keep a staffer to relight and swap for battery lights if wind flares.
6. Woven Charger Layering With Shell Napkin Rings
Style: Airy Coastal | Difficulty: Easy Styling | Best For: Tablescapes | Budget: $5 to $25 per place
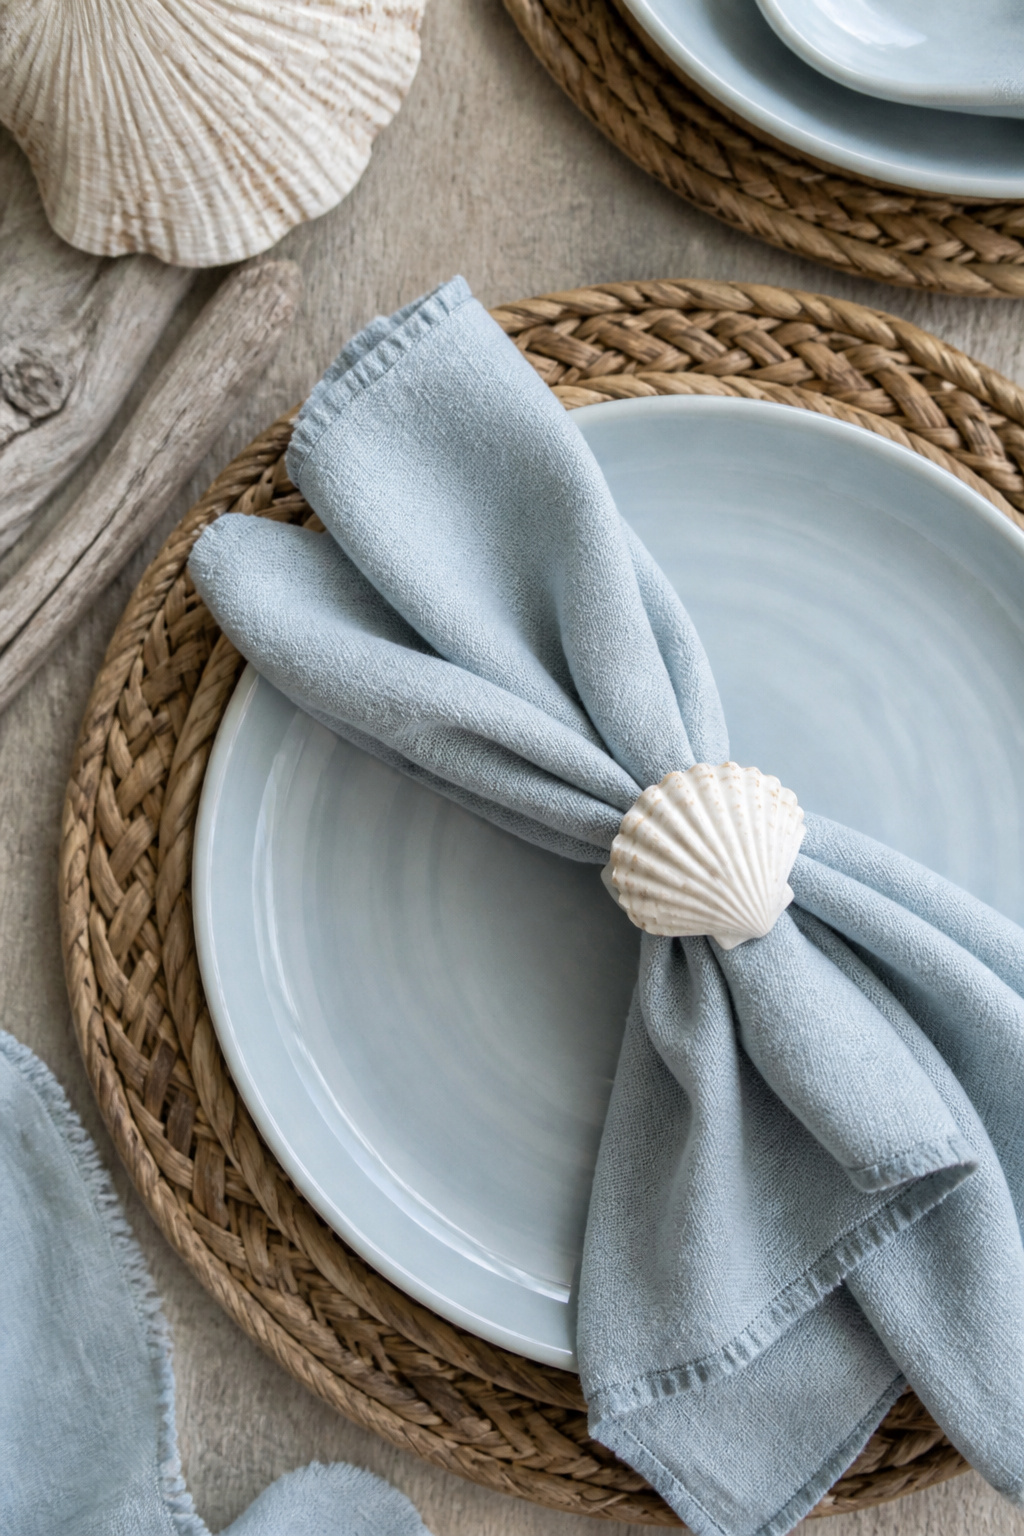
Simple swaps like chargers and shell rings make place settings feel hand-curated. At a rehearsal dinner these little details got as many photos as the main course.
What You Need:
- woven seagrass chargers, 12 inch
- pale blue ceramic plates
- shell napkin rings or small shell clusters
- linen napkins in oatmeal or soft blue
Setup:
- Place chargers and plate stacks one hour before guest arrival.
- Loop napkins through shell rings and set slightly off-center for that lived-in look.
- Ask caterer to plate on-site so plates do not slide on chargers; use non-slip dots if needed.
7. Tinted Glassware in Ocean Blues
Style: Bold Saturated | Difficulty: Moderate Sourcing | Best For: Color-forward receptions | Budget: $2 to $8 per glass
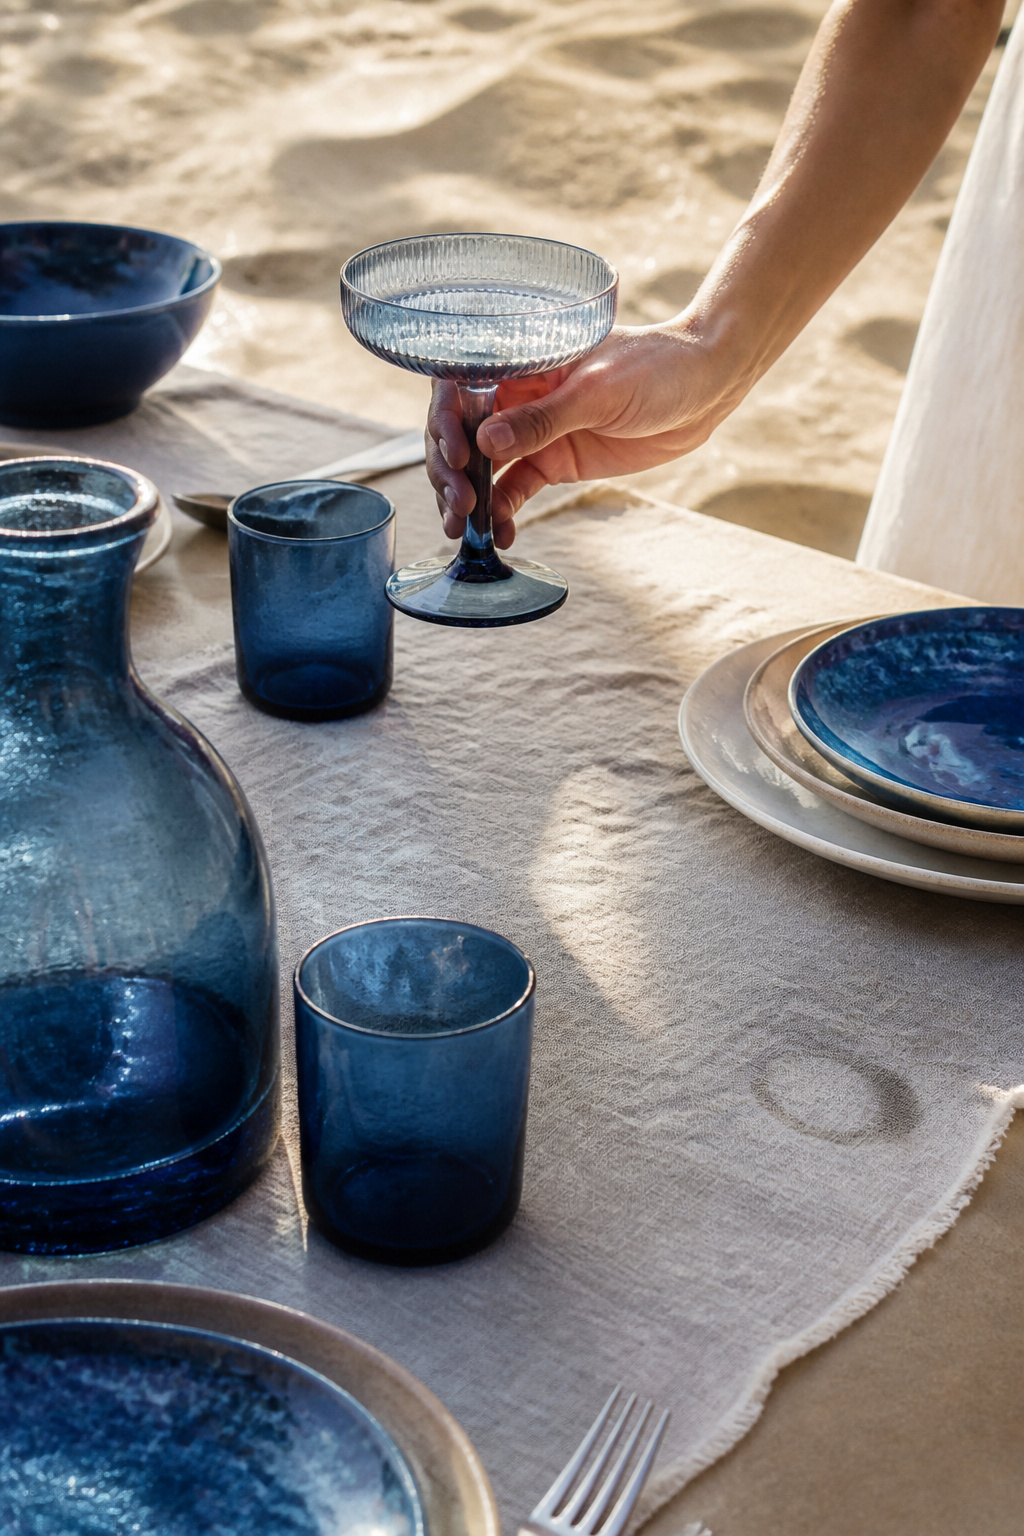
Blue glassware photographs like a mini horizon on each plate. At a Key West reception it made citrus cocktails read cooler and more editorial.
What You Need:
- mixed blue tinted glassware sets
- inventory of coupe, water, and wine glasses
- soft linen runners in complementary shades
- dishwasher-safe alternatives for rentals
Setup:
- Confirm rental counts two weeks out and request mixing of tones for a collected look.
- Polish glasses at call time and stage on rolling carts.
- Keep a small stash of clear backups; replace any chipped pieces immediately.
8. Blue Ombre Escort Display on Driftwood
Style: Airy Coastal | Difficulty: DIY | Best For: Creative escort cards | Budget: $25 to $150
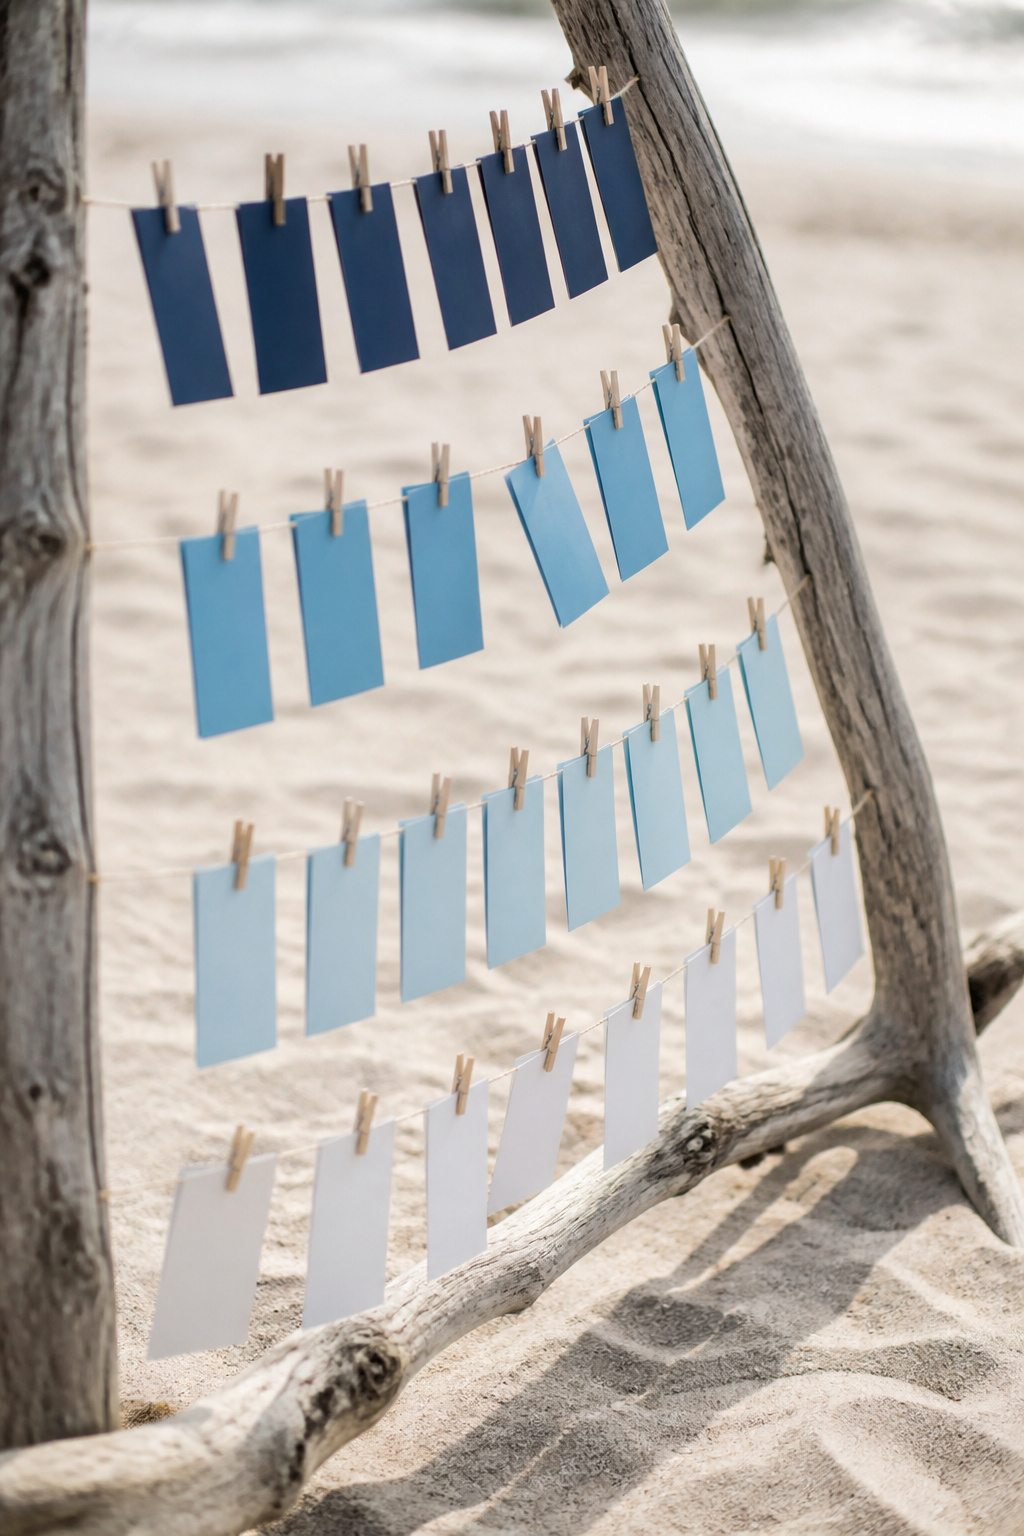
I built one of these the night before a beach wedding and guests kept returning to the display. It reads like a gradient tide rolling down the driftwood.
What You Need:
- a 6 ft driftwood plank or reclaimed beam
- ombre blue cardstock, clipped with brass mini-clothespins
- thin fishing line and two anchor stakes
- small label punch for names
Setup:
- Assemble board and string fishing line horizontally 2-3 hours before ceremony.
- Clip cards by last name order and test wind resistance; tighten lines if sagging.
- If wind is strong, move display under a tent or to a low wall nearby.
9. Low Charger Candle Gardens With Dried Lunaria
Style: Boho Coastal | Difficulty: Easy DIY | Best For: Intimate dinners | Budget: $8 to $40 per table
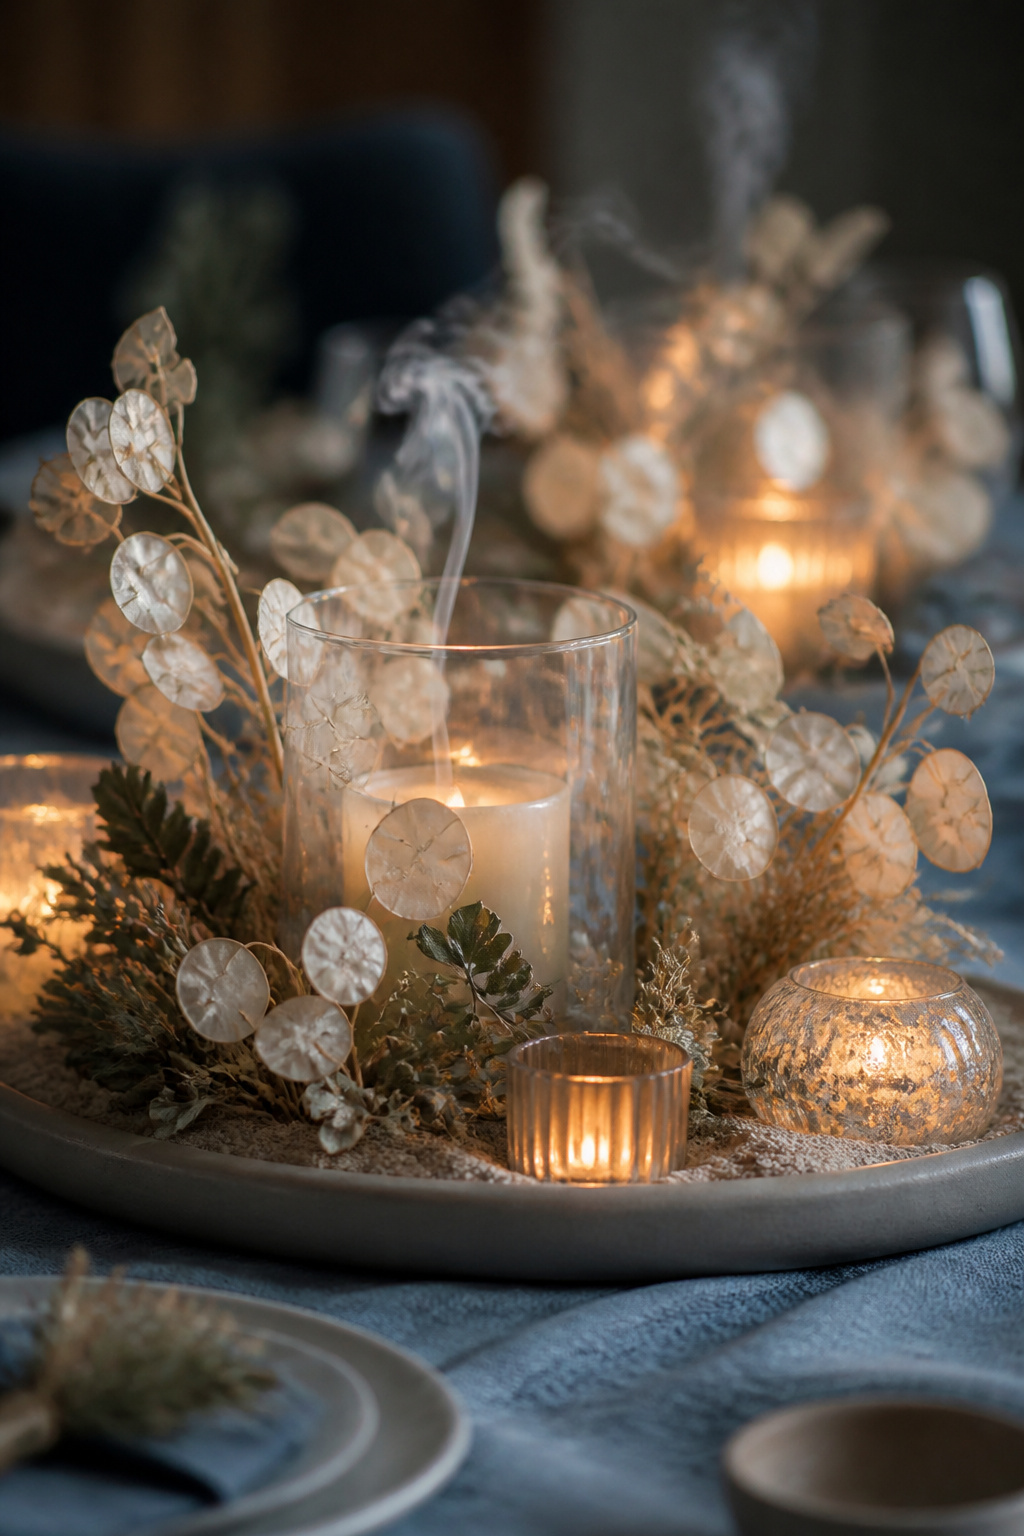
Dried lunaria holds up in humidity better than fresh petals and catches candlelight beautifully. I swapped fresh florals for dried here after a July reception went limp by midnight.
What You Need:
- low chargers or small trays
- assortment of small votives and glass tea-light cups
- bundles of dried lunaria and bleached grasses
- fire-safe sand trays for open flames
Setup:
- Arrange chargers with votives 60 minutes before seating.
- Tuck dried lunaria around candles, keeping 1.5 inch clearance from flame.
- Replace any soot-marked votives between courses and have flameless LED backups on hand.
10. Nautical Knot Napkin Wraps
Style: Nautical | Difficulty: Easy DIY | Best For: Seaside receptions | Budget: $1 to $5 per place
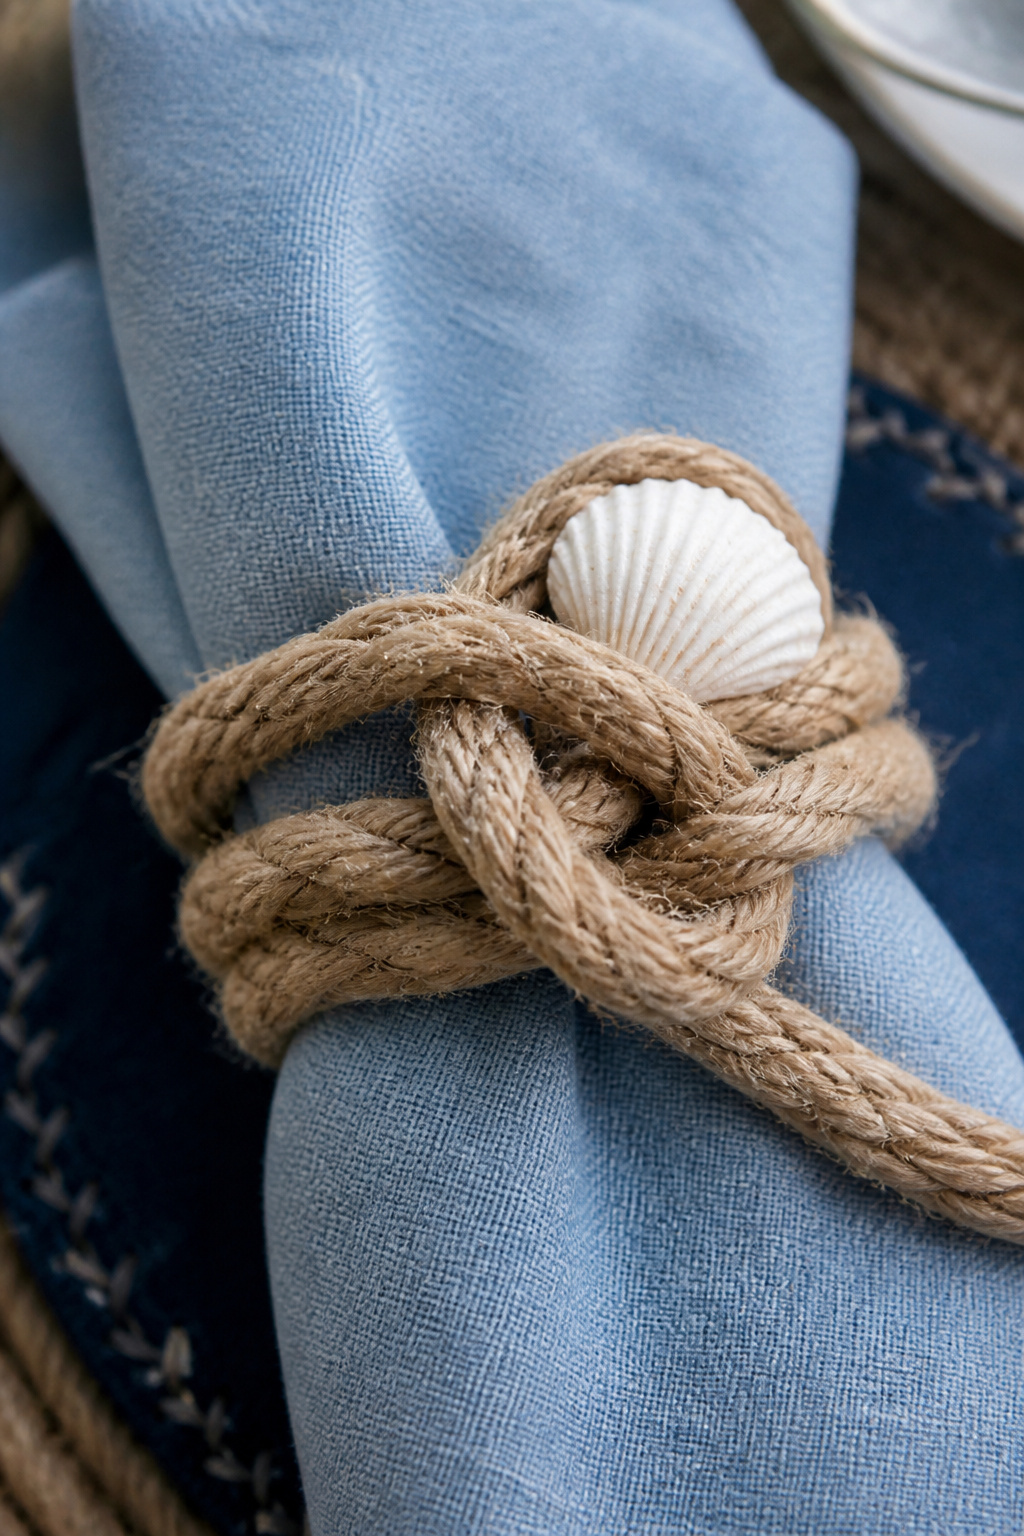
My cousin insisted on these after seeing a sailor workshop. They are sturdy, photograph well, and hide small cutlery bundles.
What You Need:
- natural jute rope, 6-8 inch cut per place
- linen napkins in soft blue or ivory
- small polished shell or knot bead
- instruction card for table runners if you have helpers
Setup:
- Fold napkins and wrap with jute, tie a simple loop knot 30 minutes before seating.
- Tuck a shell into each knot and place on plate.
- Train station staff on knot technique so setup is quick and consistent.
11. Candle-Filled Sand Bottles as Aisle Markers
Style: Airy Coastal | Difficulty: Moderate DIY | Best For: Beach aisle lighting | Budget: $50 to $200
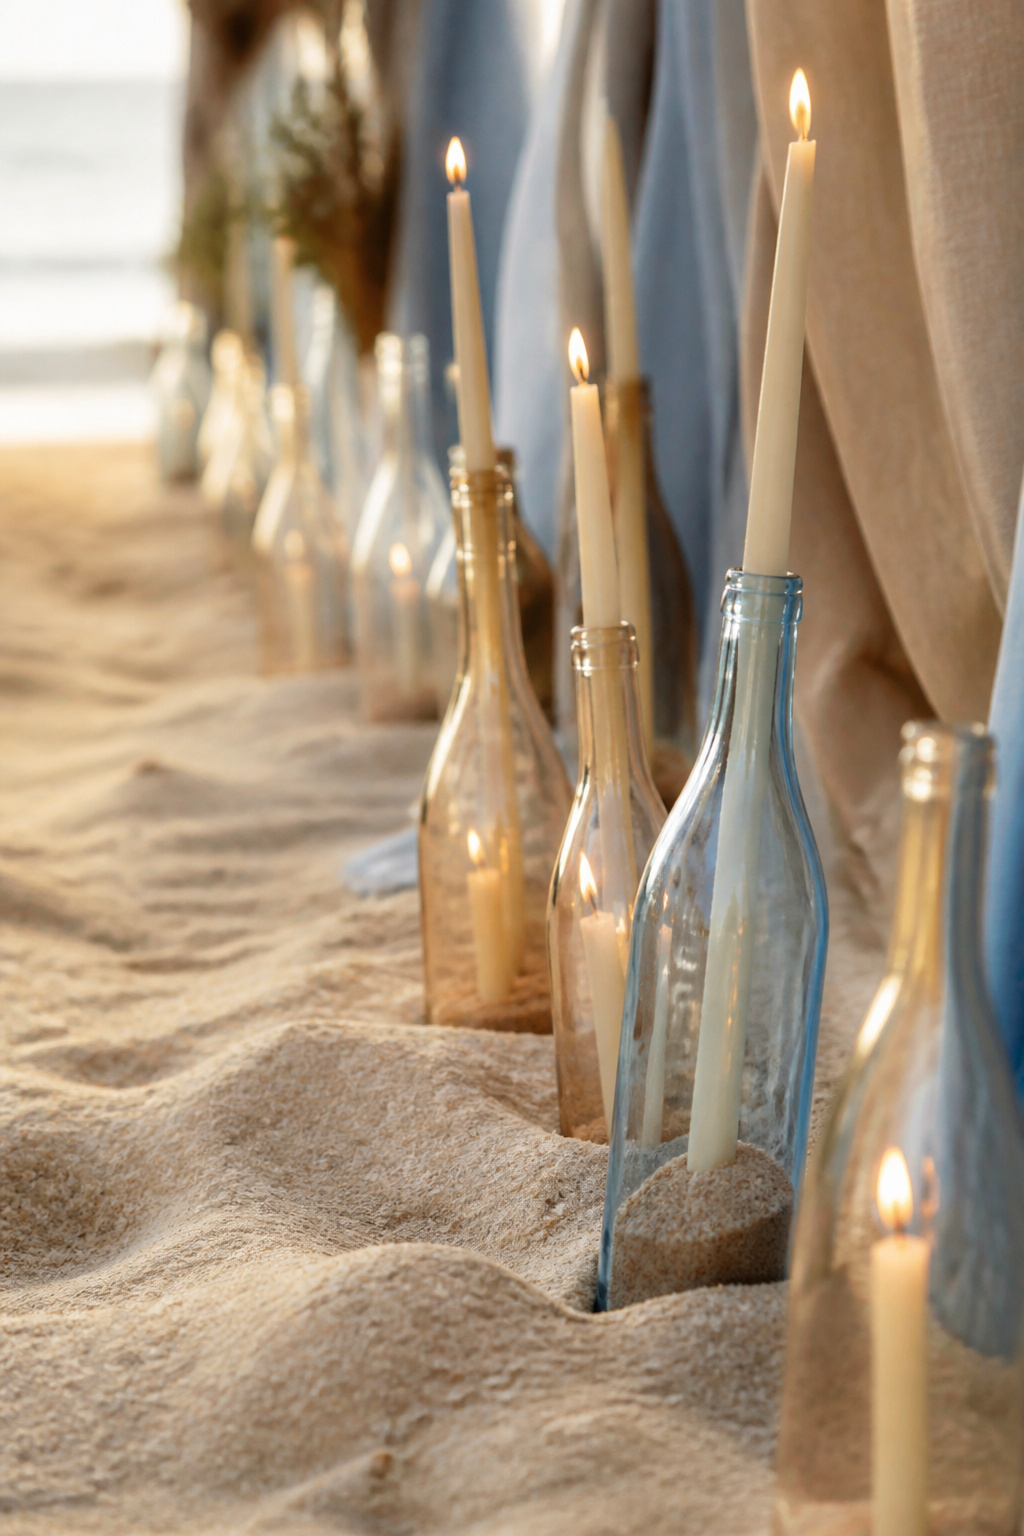
Bottles sunk into the sand keep flames low and protected. At a Sarasota wedding they saved the day when a breeze came off the water.
What You Need:
- varied glass bottles, tall taper-compatible necks
- clean dry sand for filling
- long utility lighters, hurricane sleeves for each bottle
- small brushes to remove sand smudges
Setup:
- Fill bottles with sand, set upright and partially sink into aisle edge 90 minutes before.
- Place taper in bottle and cover with clear hurricane if wind picks up.
- Keep a bucket of sand and snuffer nearby to extinguish safely.
12. Driftwood Bar With Chalkboard Menu
Style: Bold Saturated | Difficulty: Rental/Build | Best For: Casual cocktail bars | Budget: $300 to $1,000

A driftwood bar becomes a focal point and a shelter for the bartender when sun dips. Guests treat the chalkboard menu like a stage and linger to photograph.
What You Need:
- mobile driftwood-clad bar or rental bar with weatherproof finish
- freestanding chalkboard menu in navy frame
- cocktail garnish bowls and covered storage for ice
- portable shade canopy if midday service is planned
Setup:
- Position bar on packed sand or wood platform three hours before service.
- Mount chalkboard and pre-write menu with waterproof chalk markers 30 minutes before opening.
- Keep ice well insulated and staff shaded during long service windows.
13. Coastal Cake Table With Candle Ring
Style: Moody Cinematic | Difficulty: Easy Styling | Best For: Dessert display | Budget: $50 to $300
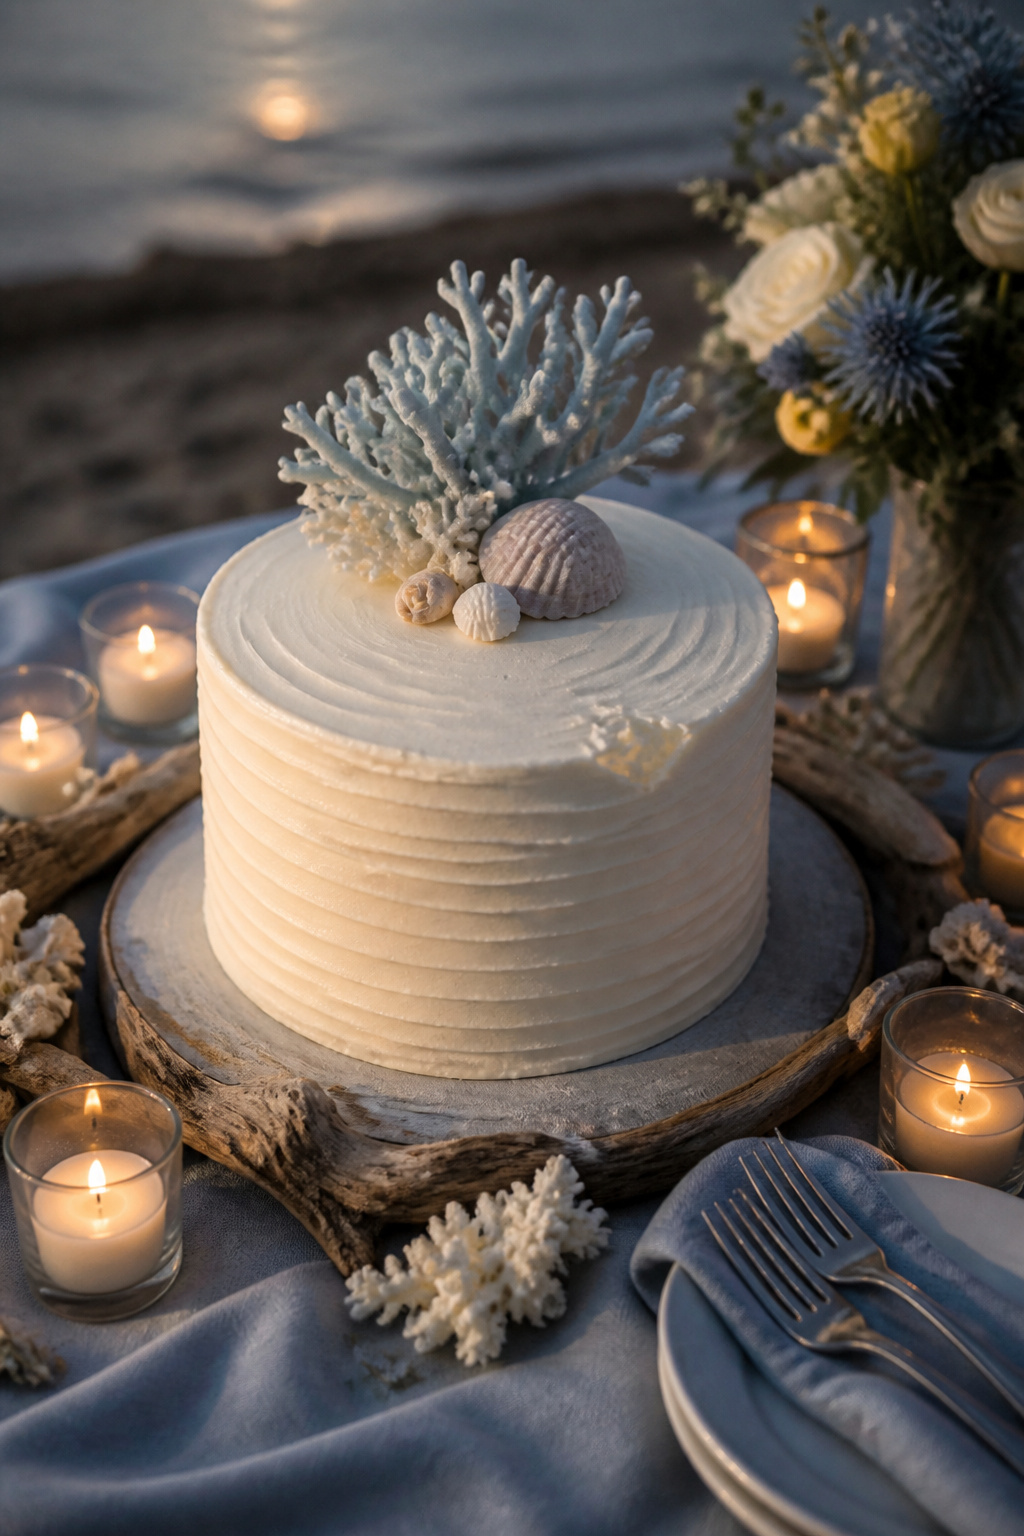
A ring of low candles around the cake keeps focus and softens flash photography. At a September reception it made cake cutting feel cinematic without a spotlight.
What You Need:
- low sturdy cake table, 36 inch round
- assortment of small votives and a few taller tapers
- textured buttercream cake on driftwood cake stand
- small fireproof trays under open candles
Setup:
- Set cake in final position 30 minutes before cutting time.
- Arrange votives in a loose ring, leave a 6 inch clear zone around cake.
- Have a staffer blow out candles before cake cutting if icing splatter is a concern.
14. Bleached Palm Fan Centerpiece With Candle Halo
Style: Bold Saturated | Difficulty: Moderate Floral | Best For: Tropical coast weddings | Budget: $60 to $250 per table
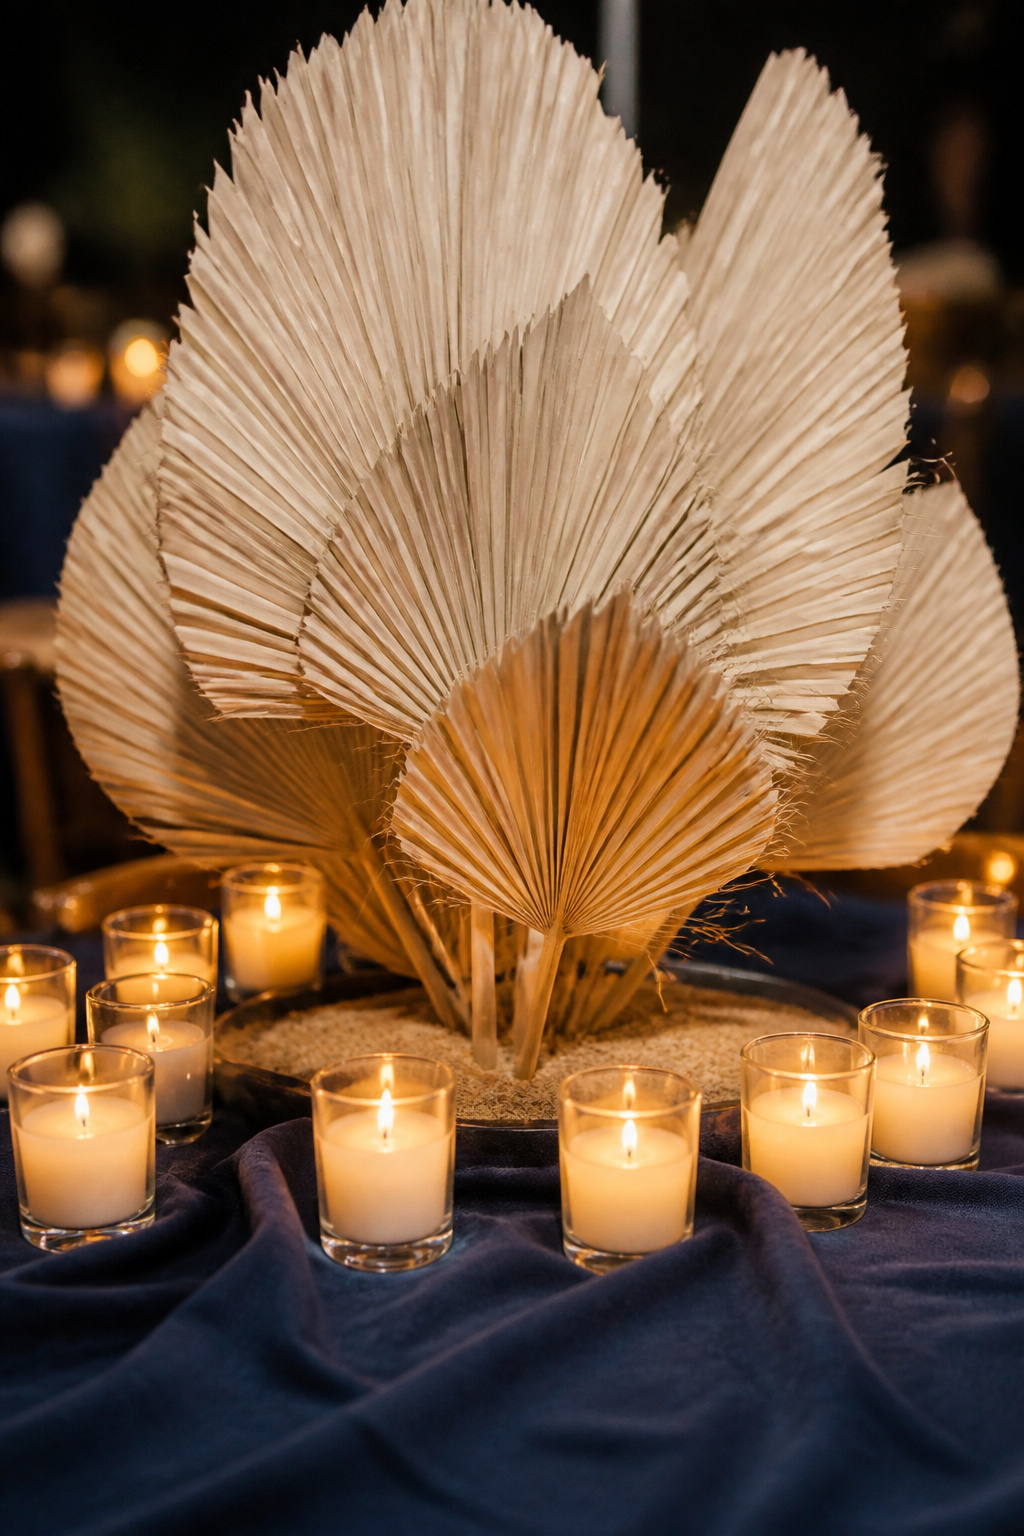
Bleached fans stand tall and resist wilting in heat. I used them at a Florida reception where humidity flattened fresh protea.
What You Need:
- bleached palm fans or preserved palm fronds
- low candle halos of votives in glass
- deep blue linens for contrast
- floral tape and weights for stability
Setup:
- Insert stems into weighted bases and arrange fans upright 90 minutes prior.
- Scatter votives around base and light 15 minutes before guest arrival.
- If wind is strong, lower fan height and add clear hurricane sleeves.
15. Handwritten Menus on Sealed Kraft Paper
Style: Airy Coastal | Difficulty: DIY Calligraphy | Best For: Rustic receptions | Budget: $1 to $6 per menu
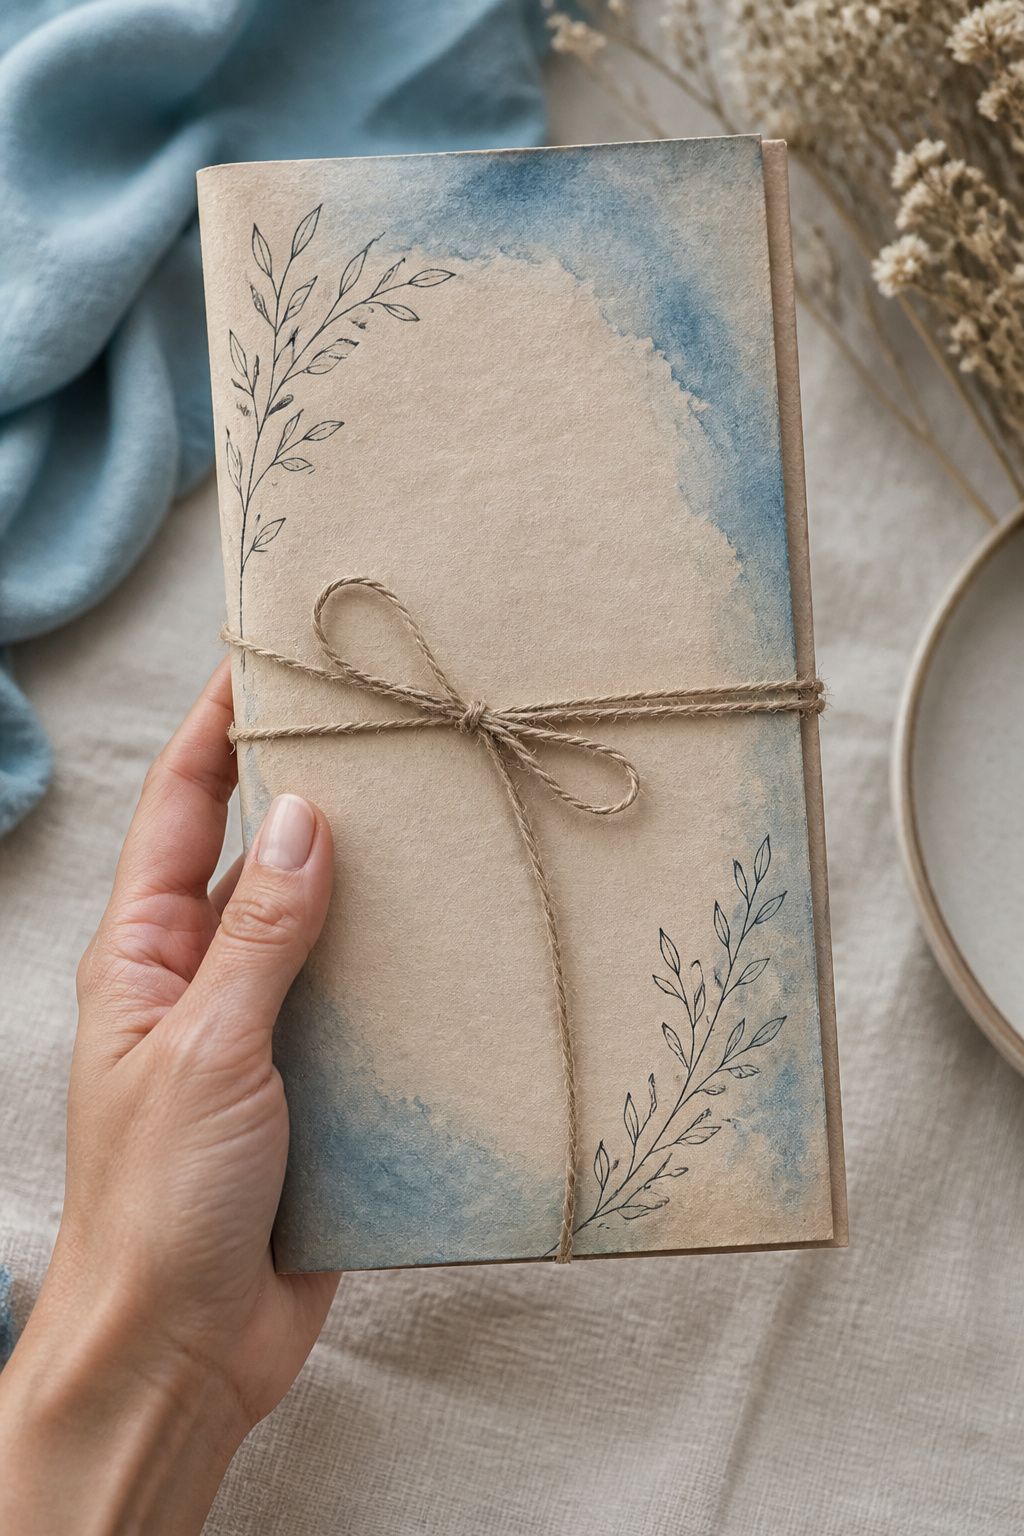
I once watched the florist finish menus on-site to match the bouquet colors. Sealing kraft paper keeps menus from curling in humidity.
What You Need:
- kraft paper stock cut to menu size
- waterproof ink pens and clear sealing spray
- jute twine and small dried sprig for tie
- practice sheets for handwritten layout
Setup:
- Handwrite menus 2-3 days ahead and seal with clear spray 48 hours before.
- Tie with jute and tuck a sprig of dried lavender or lunaria 30 minutes before seating.
- Keep extras in a cool box in case of spills.
16. Tiled Ceramic Place Markers With Calligraphy
Style: Bold Saturated | Difficulty: Moderate Sourcing | Best For: Keepsake favors | Budget: $8 to $25 per marker
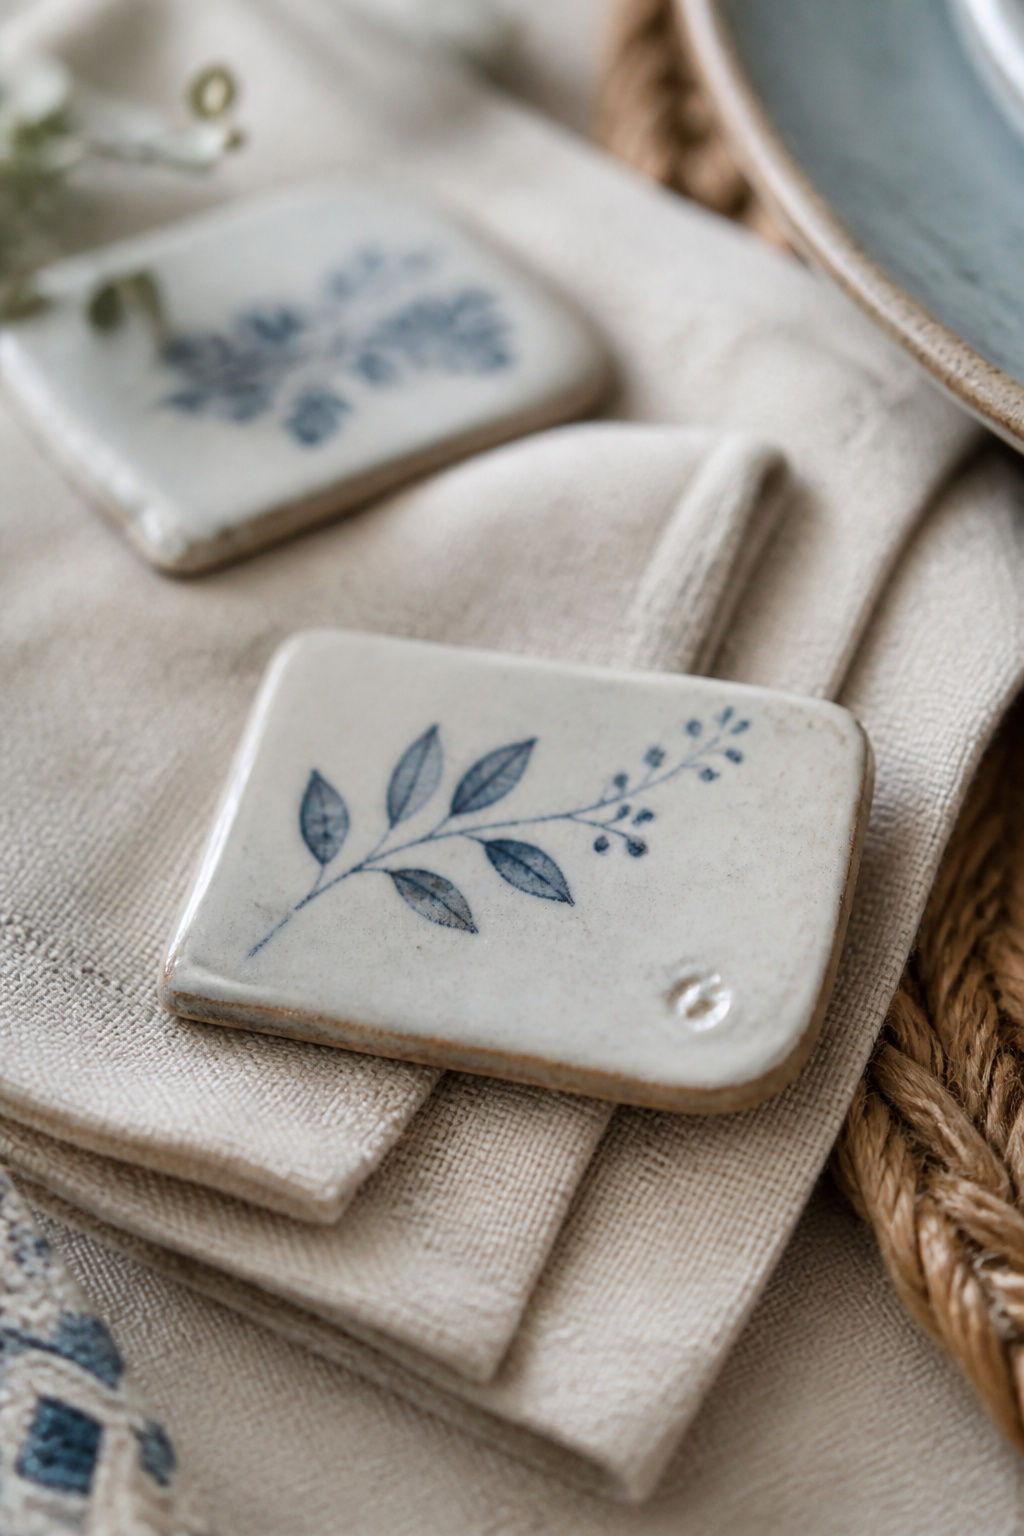
Ceramic markers double as favors and photograph like small coves of color. A custom Etsy ceramist I used required a six-week lead time.
What You Need:
- custom small ceramic tiles with glazing
- waterproof pigment pens for calligraphy
- small organza favor pouches if gifting later
- lead time calendar for ordering custom pieces
Setup:
- Order tiles at least six weeks ahead for custom glazes.
- Lay each tile on plate 30 minutes before seating and photograph a set for keepsakes.
- Keep extras in padded boxes for post-event distribution.
17. Seaweed-Inspired Runner With Linen Overlays
Style: Airy Coastal | Difficulty: Moderate DIY | Best For: Layered tablescapes | Budget: $50 to $300
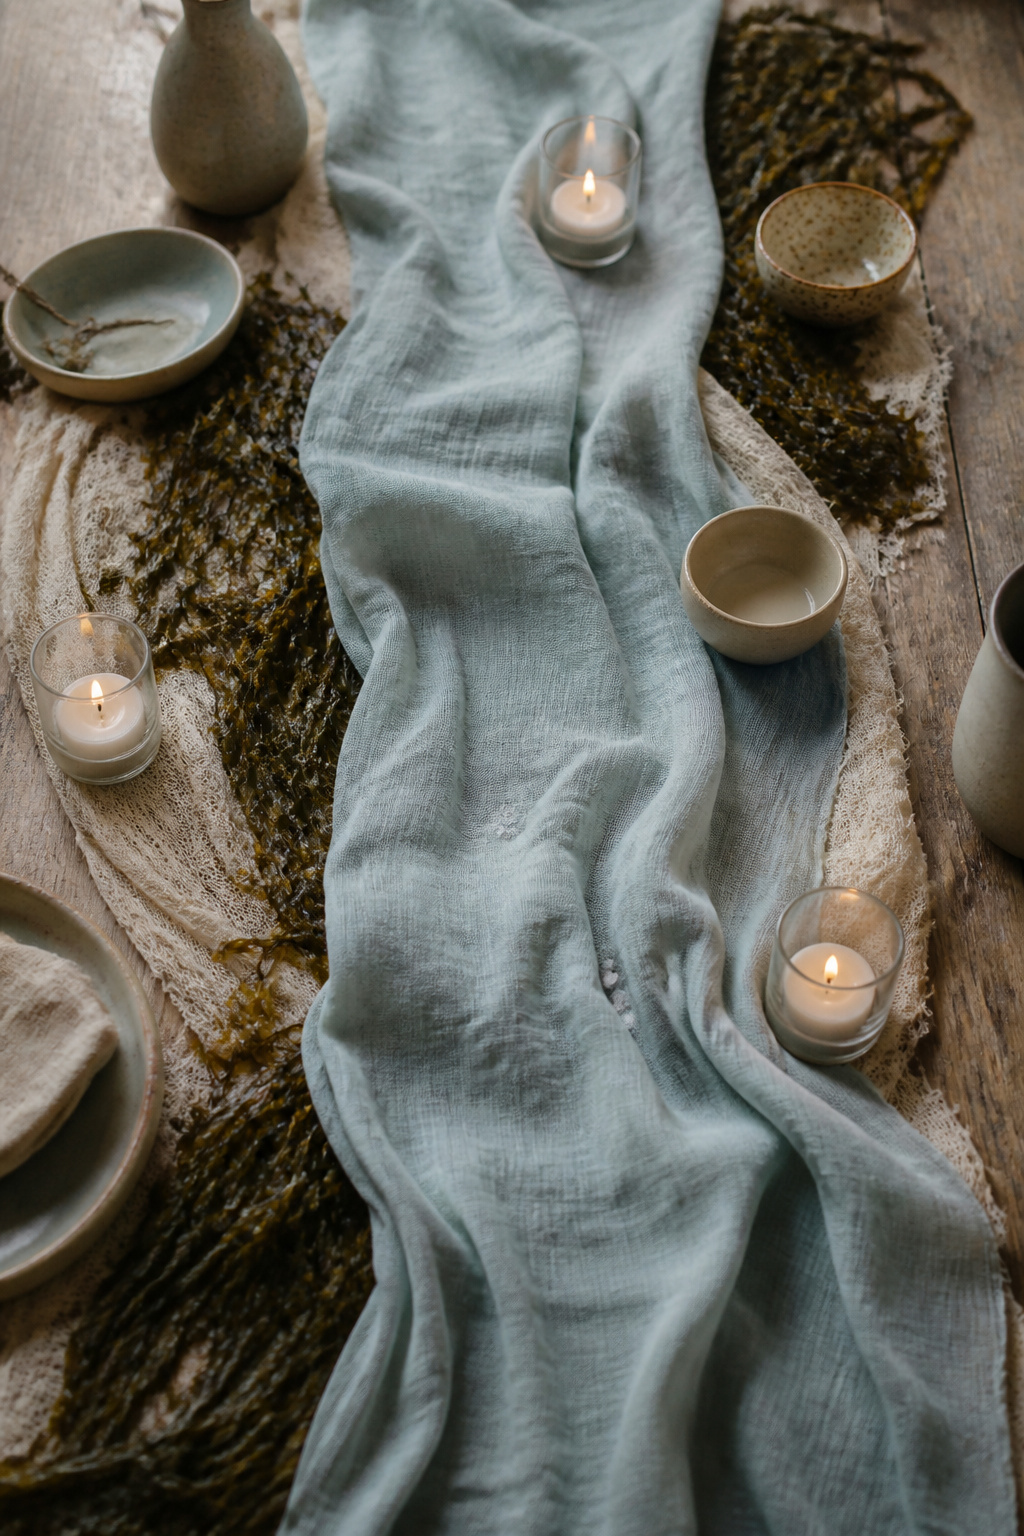
A layered runner that suggests seaweed looks intentional not messy. I stitched preserved fronds onto linen the morning of a reception and it held through a humid night.
What You Need:
- preserved seaweed or preserved fern fronds
- soft blue linen overlays
- stitch or fabric glue and small weights
- assortment of small ceramic vessels for anchors
Setup:
- Affix preserved fronds 12 hours before to let any moisture settle.
- Lay linen overlay and tuck fronds beneath votives to hide adhesive.
- Replace any fronds that show decay immediately; keep extras in a cool bag.
18. Hand-Thrown Ceramic Votives in Soft Blues
Style: Airy Coastal | Difficulty: Moderate Sourcing | Best For: Tablescapes | Budget: $6 to $30 per votive
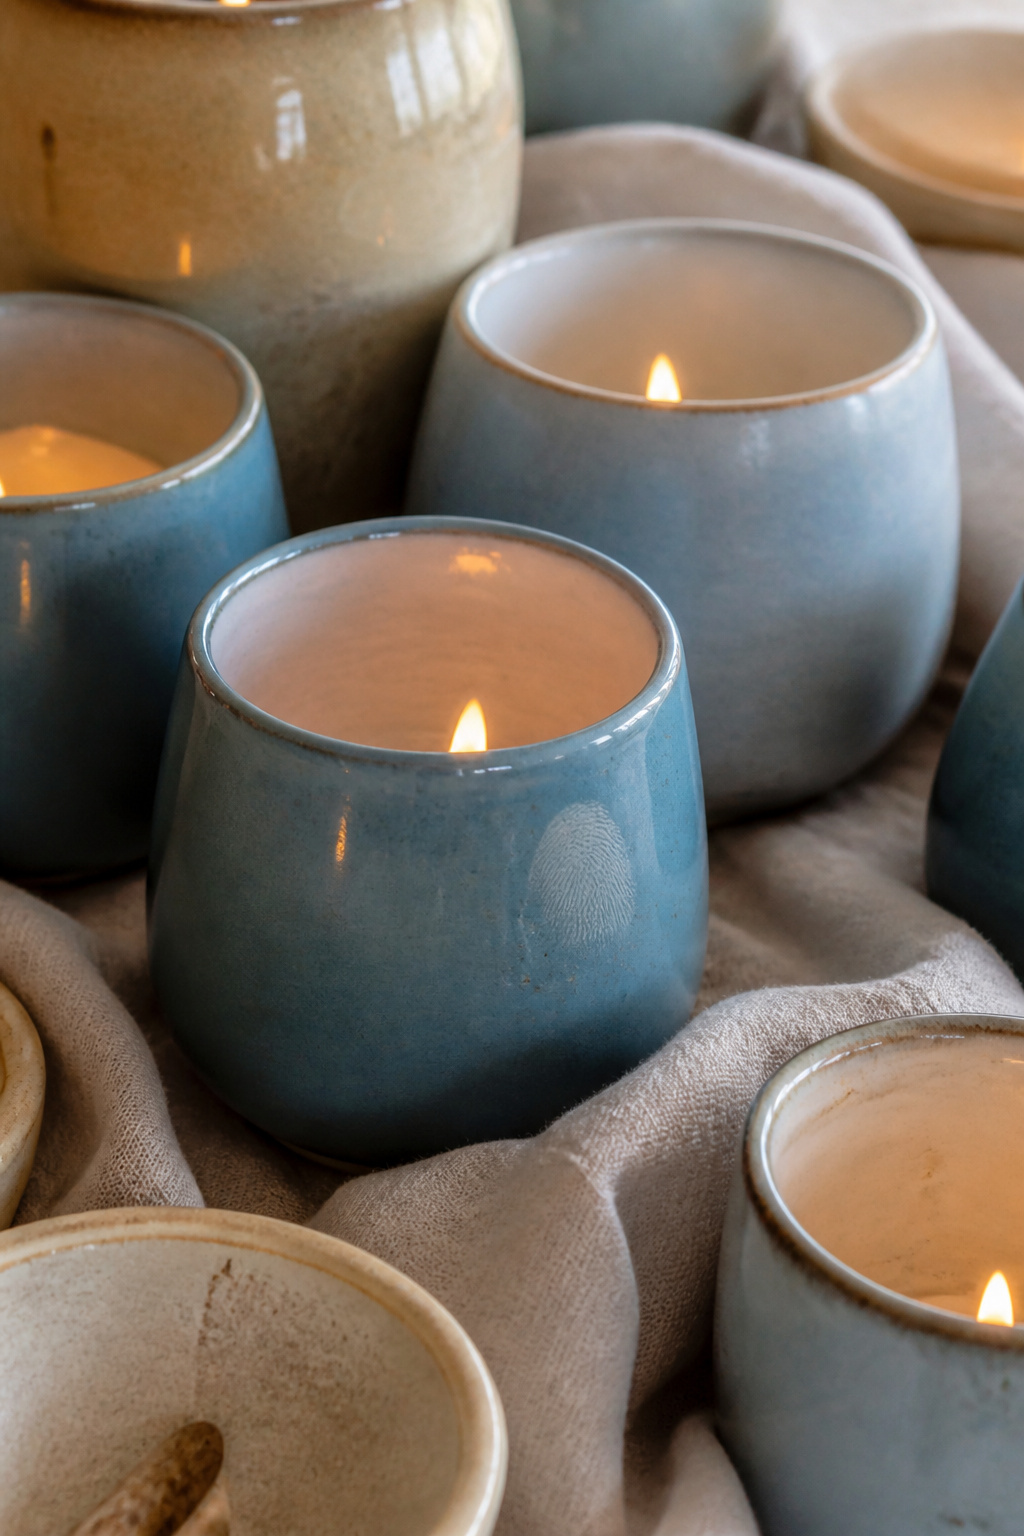
Hand-thrown pieces feel collected. I worked with a local potter for a set and kept extras; guests asked if they were for sale.
What You Need:
- 20 to 50 hand-thrown ceramic votives matching palette
- small foam inserts to protect during transport
- shipping pad or rental crate if ordering from far away
Setup:
- Confirm quantities and glaze finish four weeks prior.
- Stage votives on table and light last 20 minutes pre-seating.
- Use battery tealights as backups in high-wind spots.
19. Floating Candle Pool in a Shell Basin
Style: Moody Cinematic | Difficulty: Simple Styling | Best For: Centerpieces | Budget: $30 to $120
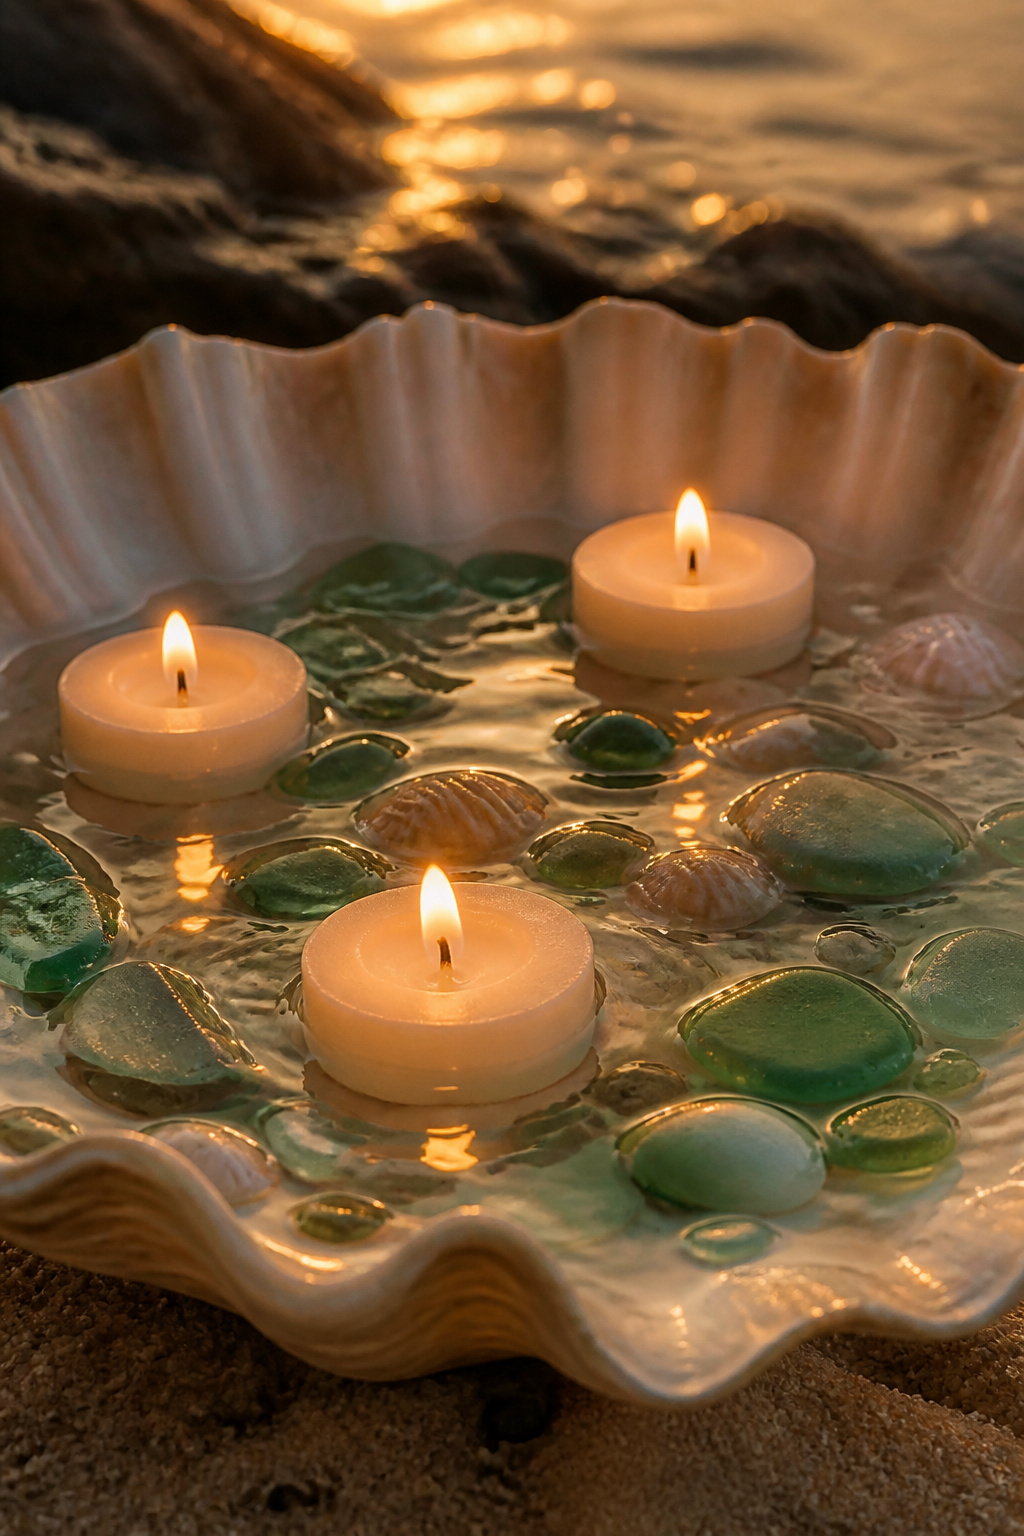
I used shallow basins to protect flames from crosswinds. Floating candles keep flame low and add reflective shimmer.
What You Need:
- shallow shell or ceramic basins, 8-12 inch diameter
- floating candles and sea-glass accents
- small pitchers of fresh water for topping up
- waterproof table pads under basins
Setup:
- Fill basins on-site 30 minutes before lighting to avoid spills.
- Arrange candles and sea glass, light immediately after placement.
- Replenish water between courses if evaporation is high.
20. Blue Ombre Draped Canopy
Style: Bold Saturated | Difficulty: Pro Install | Best For: Head table | Budget: $400 to $2,000
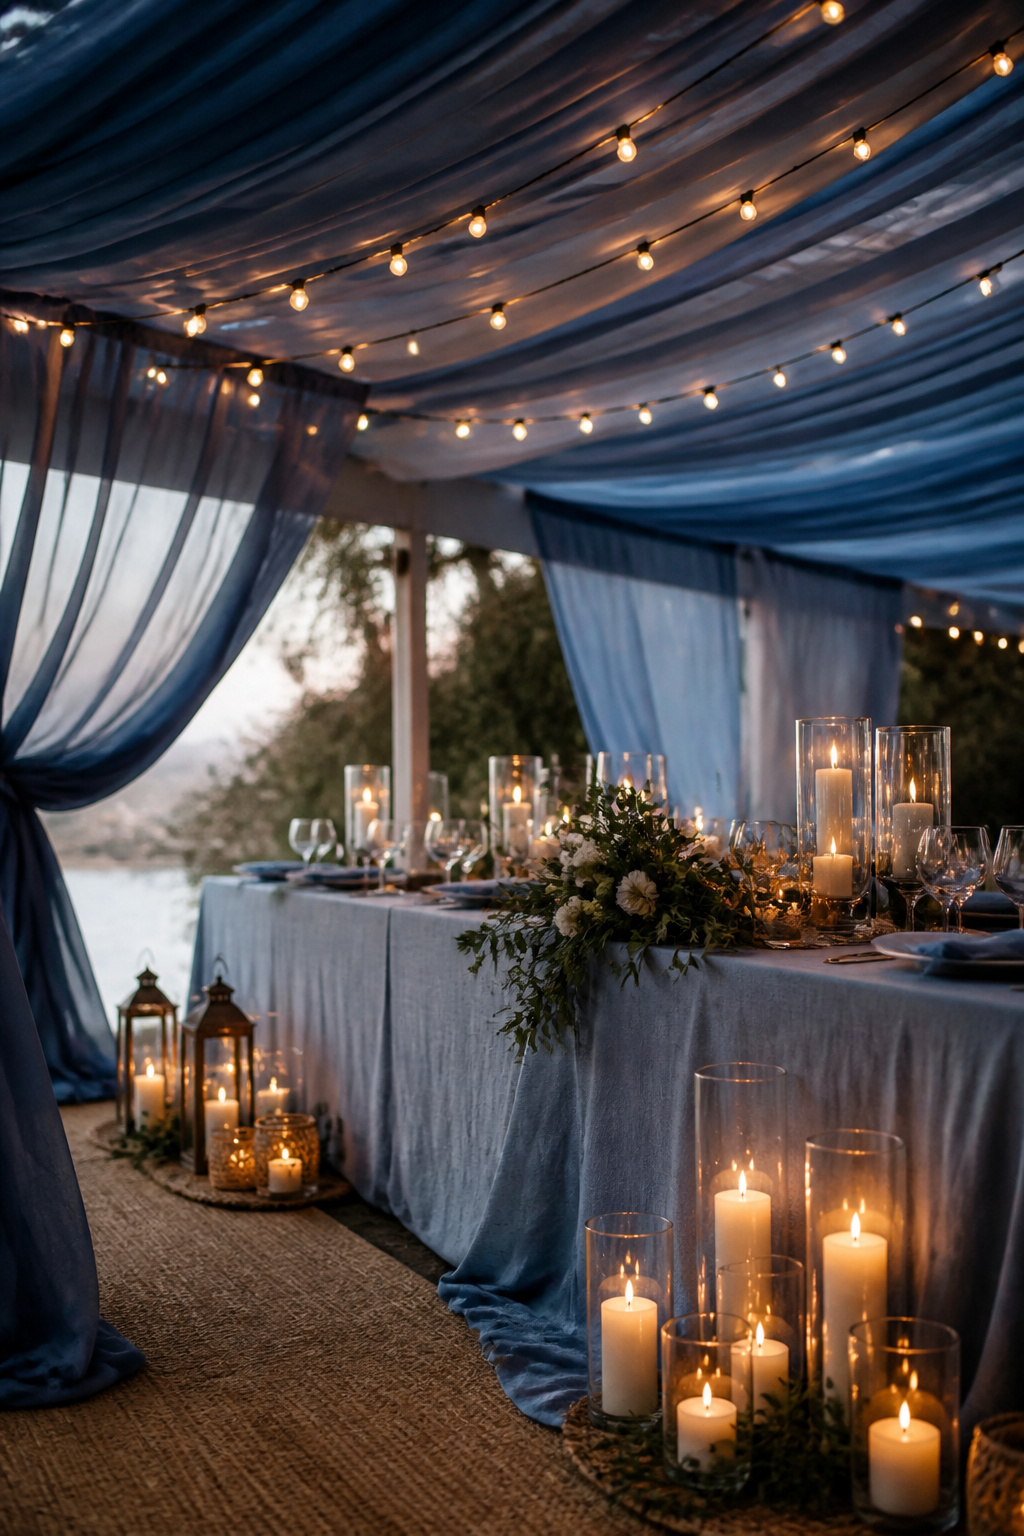
An ombre canopy draws the eye up and ties table color into sky tones. At a beachfront dinner it framed the couple without blocking the horizon.
What You Need:
- canopy frame with rigging points
- ombre-dyed gauze panels
- safety-rated rigging straps and wind anchors
- string lights for evening
Setup:
- Install frame and rigging in morning, test for sway.
- Drape panels and pin with discreet ties 90 minutes before arrival.
- Remove or lower canopy if wind exceeds safe limits per engineer spec.
21. Tiki Torch Perimeter With Lantern Path
Style: Bold Saturated | Difficulty: Moderate Safety | Best For: Dusk-to-night transitions | Budget: $200 to $800

Tiki torches give that island feel but need permits and fuel planning. I have seen setups shut down for not filing a local open-flame permit.
What You Need:
- bamboo tiki torches with secure fuel canisters
- battery lanterns for path backups
- fire safety kit and permit documentation
- sand-stabilizing sleeves or anchors
Setup:
- File permits 4-6 weeks ahead depending on local rules.
- Place torches at safe distances and test burn an hour before guests.
- Keep fire extinguisher and wet sand bucket nearby and staff briefed.
22. Seashell Escort Drop-in Station
Style: Airy Coastal | Difficulty: Easy DIY | Best For: Interactive guest moment | Budget: $20 to $100
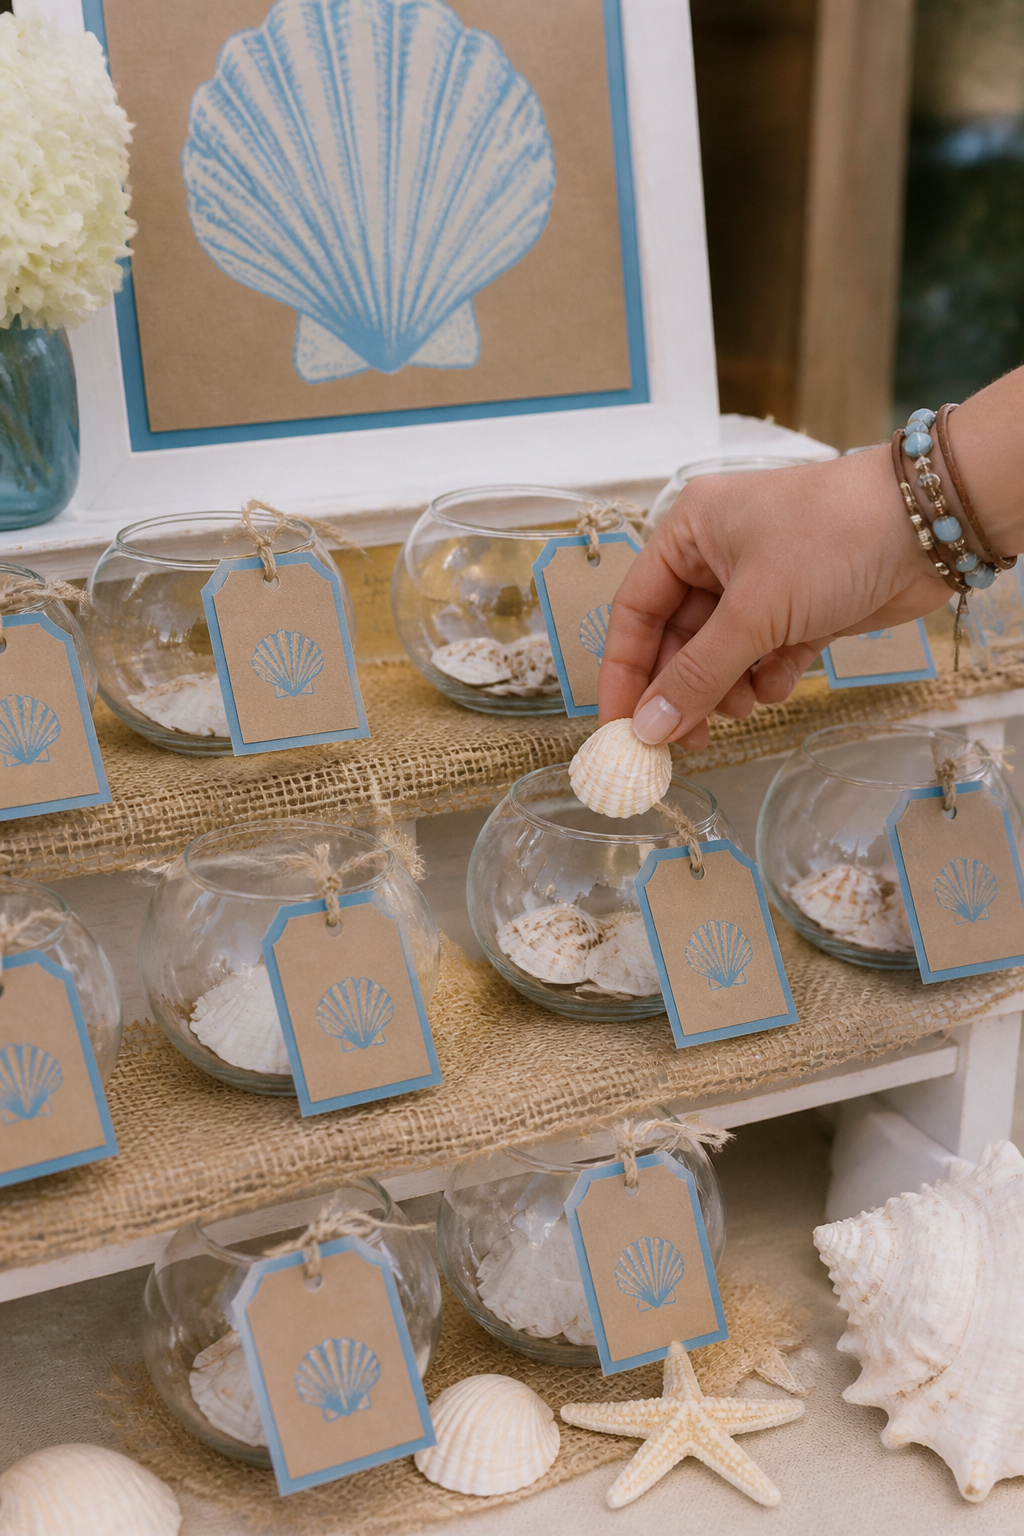
Guests enjoyed dropping shells into table bowls as a tactile escort alternative. It kept everyone moving and avoided folding paper chaos in the wind.
What You Need:
- collection of medium shells to distribute at entry
- small glass bowls labeled with table numbers
- soft blue kraft signage and jute ties
- staff to steward during arrival
Setup:
- Set station near entrance 30 minutes before guests arrive.
- Hand shells to arriving guests and explain the drop-in process.
- Move bowls indoors if wind threatens to spill contents.
23. Weathered Sail Cloth Photo Backdrop
Style: Moody Cinematic | Difficulty: Moderate Build | Best For: Photo moments | Budget: $100 to $600
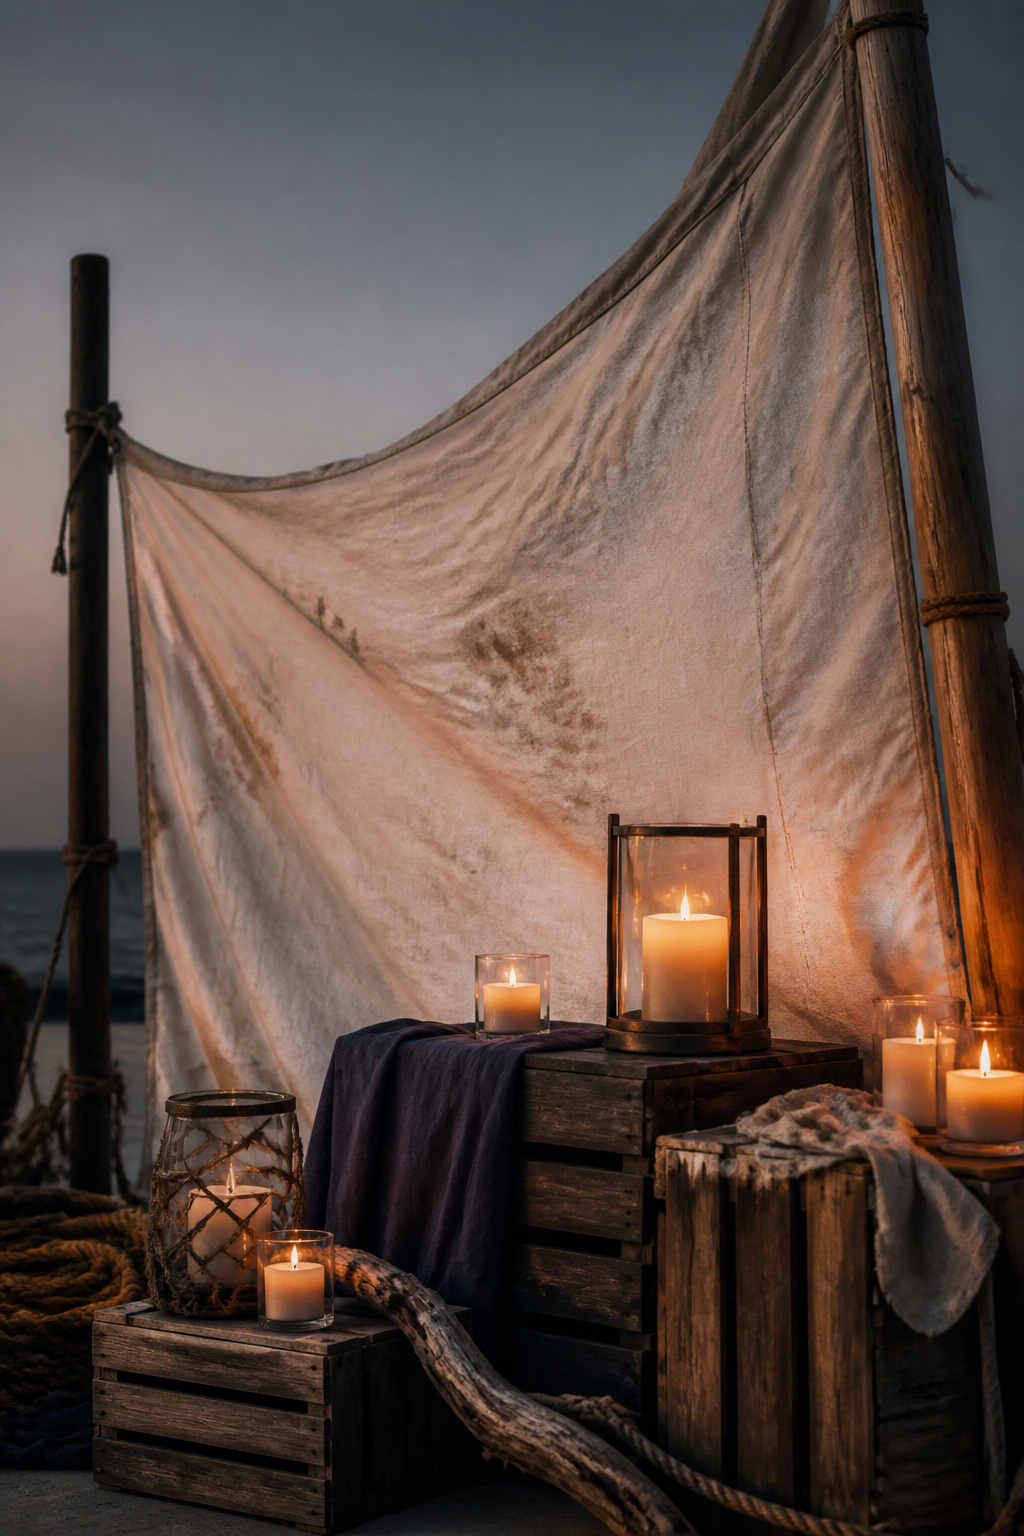
A sail cloth backdrop gives texture and rolls with the wind rather than fighting it. At a seaside reception guests used it for candid portraits all night.
What You Need:
- large sail cloth or heavy linen panel
- sturdy poles with screw anchors or sandbags
- wooden crates and low votives for foreground
- clamps and hidden ties for rigging
Setup:
- Rig backdrop against prevailing wind three hours ahead.
- Anchor securely and add foreground props 45 minutes before the photo window.
- Keep a staffer to straighten panels between sessions.
24. Salt-Cured Citrus Garland With Candles
Style: Bold Saturated | Difficulty: Moderate DIY | Best For: Tables with food | Budget: $30 to $150 per table
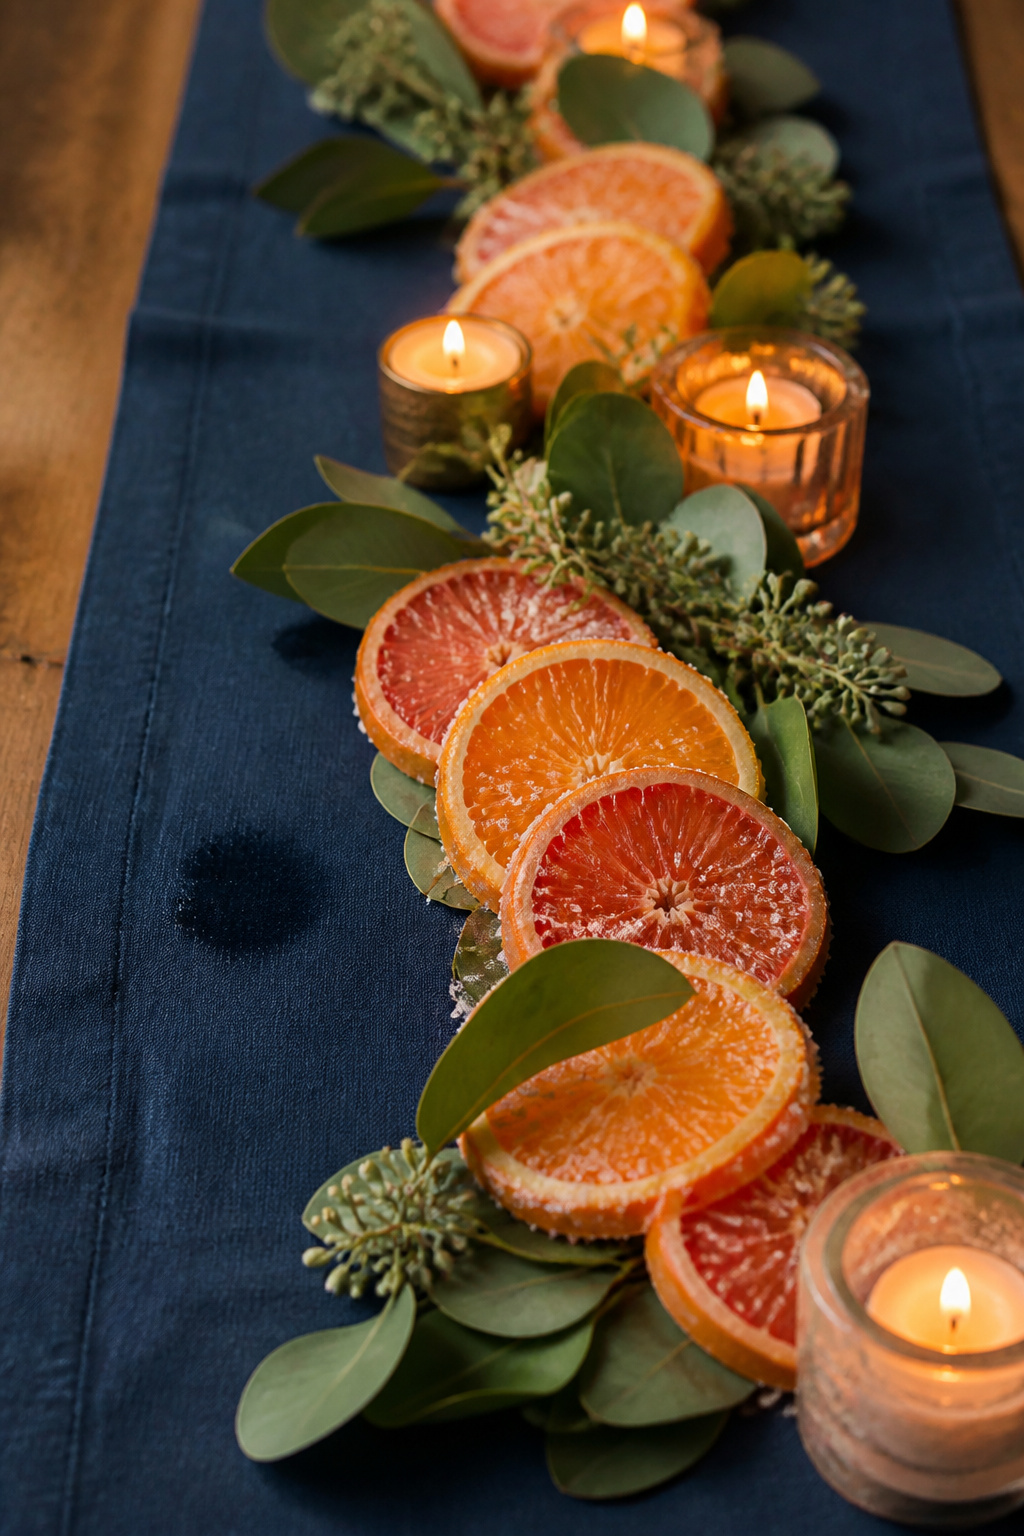
Salt-curing citrus adds scent and holds up longer than fresh citrus in heat. I watched this at a late summer reception and the aroma cut through humid air.
What You Need:
- sliced citrus cured in coarse salt for 24-48 hours
- strong twine or wire and floral picks
- small votives and heat-safe trays
- deep blue runners for contrast
Setup:
- Assemble garlands 12 hours ahead and keep refrigerated until transport.
- Lay garlands and nest candles 45 minutes before seating.
- Replace any citrus that weeps oil before service.
25. Stacked Driftwood Centerpiece With Candle Tiers
Style: Airy Coastal | Difficulty: Moderate Build | Best For: Editorial tables | Budget: $80 to $400
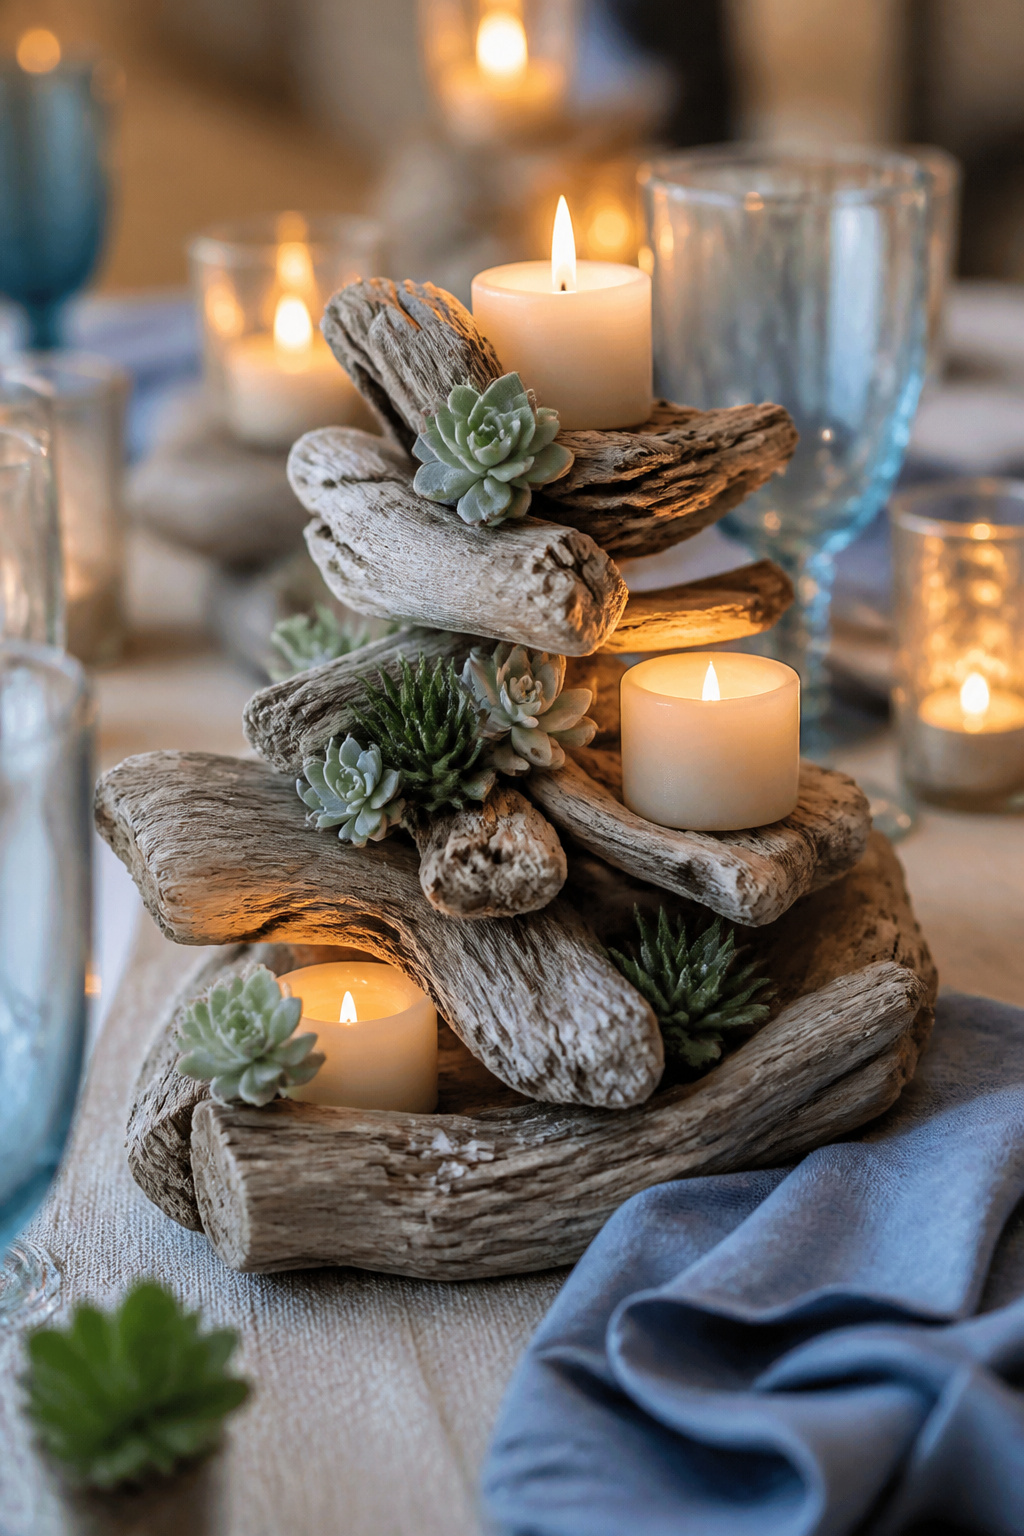
Stacked driftwood feels sculptural but is surprisingly stable if anchored. A planner friend taught me to thread dowels through pieces to stop slipping.
What You Need:
- varied driftwood pieces, pre-drilled or dowel-ready
- dowels and wood glue for internal anchoring
- candle tiers or small succulent pots for accents
- non-slip pads for base contact
Setup:
- Pre-drill and assemble driftwood on a workbench days ahead.
- Transport in padded crates and set centerpieces 60 minutes before seating.
- Check balance and secure any loose pieces with clear epoxy if needed.
26. Golden Hour Toast Zone With Blue-Glass Coupes
Style: Moody Cinematic | Difficulty: Easy Styling | Best For: Sunset toasts | Budget: $150 to $600
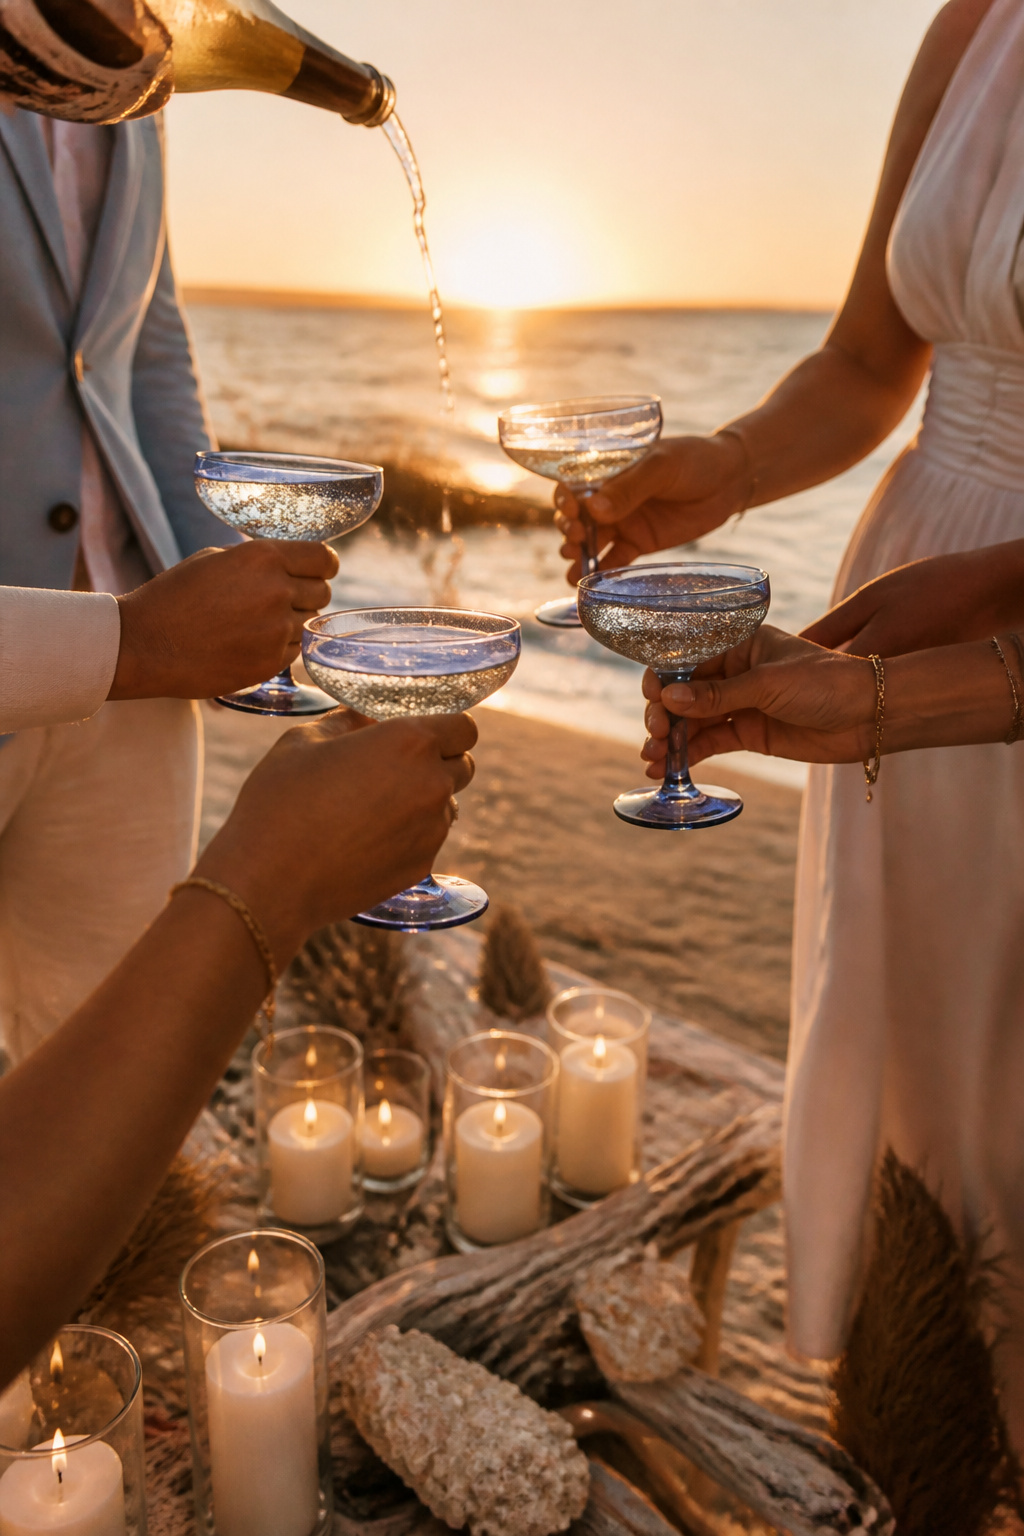
I timed a toast once to the exact minute of sunset and the blue coupes caught light like a small horizon in each hand. Planning the timing makes the photo magic repeatable.
What You Need:
- 40 to 80 blue-glass coupes
- small candle clusters and a signing table
- assistant with countdown cues and wind-proof lighters
- speaker cue for music sync
Setup:
- Stage coupes chilled and ready at the service station 20 minutes before sunset.
- Call guests five minutes ahead and staff a two-person pour team.
- Cue the toast with a 1-minute heads-up and a photographer vantage point for silhouette shots.
What You Will Need to Pull This Off
Structural Essentials
- Arch frames: 6 to 8 ft weatherproof wood or metal, $80 to $600
- Weighted bases and screw-in sand anchors, $20 to $80 each
- Portable power generator or battery packs for lighting, $150 to $600
- Rental tables and chairs with non-sink legs for sand, $20 to $75 per seat
- Canopy frames and rated rigging straps, $100 to $400
Florals and Organic Elements
- Preserved pampas bundles, $8 to $35 each
- Bleached palm fans and preserved fronds, $12 to $60 each
- Dried lunaria bundles, $6 to $25 each
- Hand-tied dried citrus or seaweed accents, $10 to $40 per table
Lighting
- Edison bulb strings rated for outdoor use, $60 to $300
- Glass hurricane votives and battery backups, $3 to $15 each
- Tiki torches with fuel canisters, $12 to $40 each
- Solar fairy lights for low-power zones, $15 to $60 per strand
Textiles and Surfaces
- Soft blue gauze runners, $15 to $80 per yard
- Woven seagrass chargers, $4 to $25 each
- Hand-dyed ombre gauze panels, $60 to $300 per panel
- Linen napkins in coastal shades, $2 to $12 each
Planning Resources
- Tide chart tools: NOAA tide tables or local harbor websites, free to $10 for printouts
- Permit checklist: city park or county beach permit offices, start 4 to 8 weeks ahead
- Vendor platforms: Etsy for custom ceramics and place markers, local party rental for structures, and a potter or florist contact for bespoke pieces
Where to Source It
Etsy is honest for handmade place markers and pottery but expect 4 to 8 week lead times for custom glazes. Local party rental houses will save you money on tables, seating, and tents compared with buying outright. For preserved botanicals and dried material try specialty wholesalers; they ship large bundles cheaper than craft stores. If you need quick throwaways like LED votives or bulk napkins, Amazon or national party suppliers are fine for last-minute buys.
Planning Tips for a Beach Wedding
File Permits Early: Start the permit conversation at least 6 to 8 weeks out, some municipalities require 90 days.
Use a Tide Chart: Schedule ceremony and photos around low tide where you need shoreline width, and confirm sunrise/sunset times for golden-hour planning.
Wind-Proof Everything: Anchor arches with screw-in anchors, use calmer low-profile centerpieces, and always have battery LED backups.
Heat and Humidity Swaps: Swap delicate blooms for preserved or dried options in summer months to avoid limp arrangements.
Stagger Vendor Arrival: Ask florists and rental crews to arrive 3 to 4 hours before guest arrival for staging on sand.
Weather Contingency Plan: Have a mapped indoor or tented backup with the same color palette so photos match; confirm backup vendor availability early.
Make-Ahead Prep: Assemble non-perishable décor items like place markers, napkin wraps, and votive clusters 3 to 5 days ahead and box by table to speed day-of setup.
Frequently Asked Questions
Q: Do I need a beach permit for candles and torches?
A: Most beaches require permits for open flame. Check local park or county resources 6 to 8 weeks before and budget for a small permit fee.
Q: How do I keep candles lit in ocean breeze?
A: Use enclosed hurricane glasses or low glass votives sunk slightly into sand, and keep battery LED backups on hand for gusty stretches.
Q: Can I use fresh flowers in humid summer months?
A: Yes but plan for hardier varieties and refrigerate until the last moment; consider preserved florals as a more weatherproof 2025-forward option.
Q: How long do custom ceramic favors take to arrive?
A: Expect 4 to 8 weeks for custom pieces from small studios; order sooner if you need custom glazes or calligraphy.
Q: What's the best time for coastal reception photos?
A: Golden hour for silhouettes and candle glow, plus 20 to 30 minutes prior for landscape shots. Coordinate timing with your photographer.
Conclusion
Pick one anchor idea from this list and build around it. Whether it is a low tide long table or a driftwood bar, the consistent detail that ties everything together is color and texture, especially the soft blues against warm candlelight. Which of these coastal wedding reception ideas fits the venue and vibe you are picturing?