
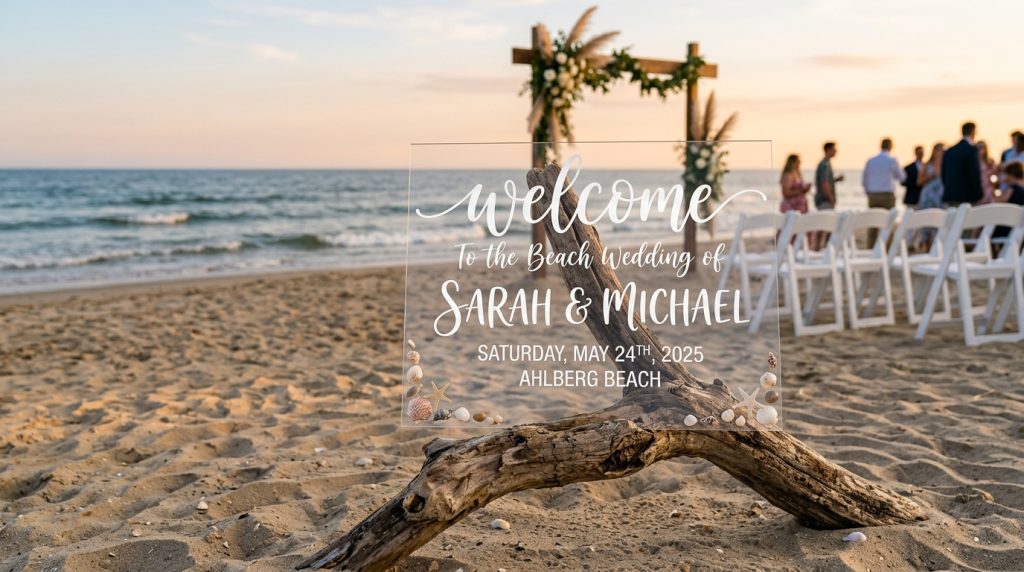
how to diy acrylic wedding signs so they look crisp, professional, and—most importantly—don’t smudge or bubble on ceremony day. I learned this the hard way when my cousin’s welcome sign smeared after a midday breeze. This guide will get you to a smudge-free, bubble-free finished sign for about $15–$60 depending on size and tools.
You’ll learn the exact materials I trust, the reverse-painting trick that saves your lettering, why vinyl often beats freehand on windy beaches, and quick fixes for bubbles. Suitable for intimate beach ceremonies, micro-weddings, and elopements.
1. Set the Scene: Ceremony Arch and Aisle Styling
Start with the visual result: a clear sign that reads well in photos and holds up to salt air.
Choose size by sightline. For a small aisle, 11×14 is readable up close. For an entrance or arch, go 16×20 or 18×24. I ordered a 16×20 clear acrylic panel from Amazon (search “clear acrylic sheet” — tag: theoceanvows) and it was under $20.
If the sign sits on an easel, weigh the base with sandbags or shells in tied muslin. Ugly truth: lightweight signs flop in wind. Anchor early.
Pro tip: place the sign where the sun isn’t behind it; backlight can wash your lettering in photos. Matte-mounted signs photograph better than glossy ones in harsh sun.
2. Layer Texture with Coastal Table Décor (Use Signage as a Table Anchor)
Think of your sign as a tabletop vignette too. I used a small acrylic menu on a driftwood slice and it pulled the tablescape together.
If you’re making table menus on acrylic, go thin (1/8 in) so plates don’t wobble. Seal the painted side if it’ll face up—sand, salt, and guests’ hands are brutal.
Combine acrylic with natural textures: shells, jute, linen runners. The contrast of glossy acrylic and raw linen is what photographs like a pro.
Common pain point: fingerprints. They show. Wipe with a microfiber cloth right before photos.
3. Dress for Sand and Wind: Paint, Vinyl, and Reverse-Painting Techniques
This is the heart of how to diy acrylic wedding signs without smudging or bubbles.
Ugly truth: brush paint on the front smudges easily and collects grit. Fix: paint on the back (reverse painting). Mirror your design, paint on the reverse, and the front remains protected.
Step-by-step:
- Clean panel with isopropyl alcohol and a lint-free cloth.
- If hand-lettering, sketch your mirrored design on paper, place it against the back, and trace with a soft marker.
- Use opaque, acrylic-compatible paints or Posca/Artistro paint pens. I prefer a 2–3mm white Posca for crisp lines.
- Let paint cure 24–72 hours. Long cure beats instant regret.
Vinyl option:
- Cut vinyl lettering (Oracal 651) with a Cricut or Silhouette.
- Weed slowly. Use transfer tape and a firm plastic squeegee (credit card works).
- Warm the vinyl slightly with a hairdryer to reduce bubbles and improve adhesion.
- Apply from one edge to the other to push air out.
Why vinyl sometimes wins: it won’t bleed like paint and is faster for block fonts. Ugly truth: vinyl edges can peel if the acrylic isn’t cleaned well.
4. Avoid Bubbles: Application and Sealing Hacks
Bubbles come from trapped air, moisture, or applying finishes too fast.
My bubble checklist:
- Work in a dry, dust-free room. Humidity = potential bubbles.
- When applying vinyl or transfer tape, use a squeegee at a 45° angle; press from center outward.
- For painted backs, don’t topcoat right away. Wait full cure. If you must spray-seal, test on a scrap acrylic first.
- If you get tiny bubbles under vinyl, prick with a needle and smooth with the squeegee.
Seal smart: a thin coat of a compatible clear acrylic sealer protects paint from fingerprints. I use a matte sealer for beach photos (gloss throws glare).
5. Finish with Florals, Favors, and Final Details
Small finishing moves make signs feel bespoke.
Add glued shell accents or a tiny sprig of dried pampas on a corner—attach on the painted side so nothing peels off.
Label escort signs with a thin vinyl name strip rather than writing by hand; it’s neater at scale.
Pack a signage kit for the day: microfiber cloth, small squeegee, clear tape, and a spare marker for touch-ups.
Ugly truths to remember:
- Salt and wind will test every “perfect” DIY product.
- Paint pens can look great up close but need curing time.
- Weight and anchoring matter more than pretty script.
Quick tool list (what I actually used):
- Clear acrylic sheet, 16×20 (~$15–$30)
- Posca paint pens or Artistro paint pens
- Oracal 651 vinyl + transfer tape
- Cricut or Silhouette (or order vinyl cut from Etsy if you don’t own one)
- Microfiber cloth, isopropyl alcohol, plastic squeegee, hairdryer
- Matte clear acrylic sealer (test first)
If you want a simple pre-cut kit, search “acrylic sign kit” on Amazon (affiliate tag: theoceanvows) for pre-cut panels and mounting hardware.
Wrap-up: do a full dress rehearsal.
Make one practice sign. Hang it, walk around it, photograph it in bright sun and shade. That one test run saved me from a panic fix the morning of the wedding.
If you want, tell me your sign size and font style and I’ll tell you whether to paint or vinyl—and what exact pen or vinyl I’d use.