
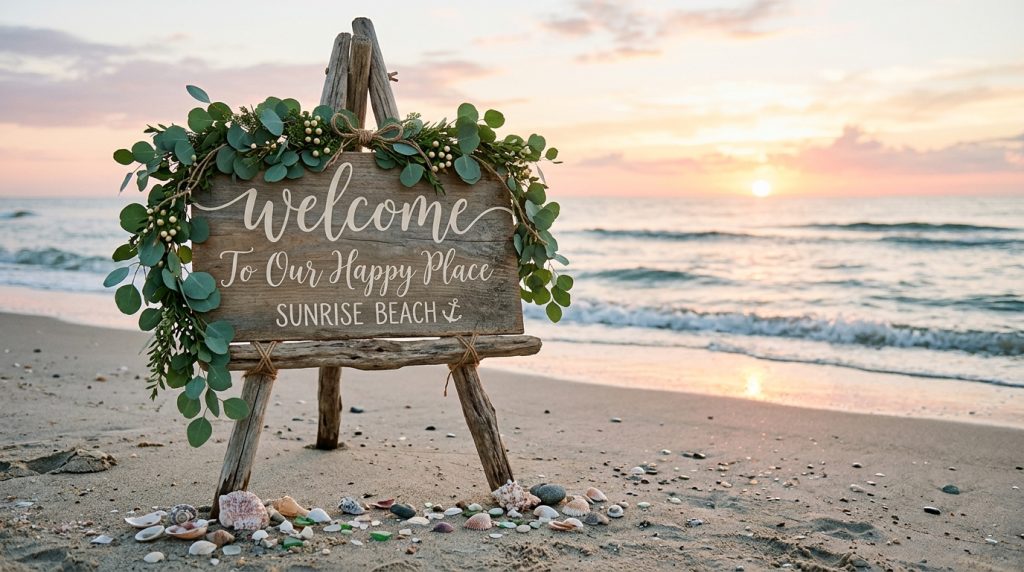
How to make wedding welcome signs that don’t look mass-produced was the question I got after my cousin’s beach ceremony went viral in our friend group. Guests kept asking where we bought it — when really, I spent two afternoons and $42 making it.
You’ll learn exact materials, scale rules, font choices, and simple weatherproofing for a natural, lived-in look. Budget: about $30–$120 depending on size and tools (DIY basic to craft-kit level).
This is for barefoot-luxe or boho-coastal couples who want artful signage without a custom calligrapher. It’s great for intimate elopements, micro-weddings, and venue-conscious DIYers. Lately I’ve noticed couples favor driftwood frames and muted sea-glass palettes over glossy acrylic.
1. Set the Scene: Ceremony Arch and Aisle Styling
A welcome sign should read as part of the ceremony vignette — not a separate billboard.
Place it where people naturally stop: parking-to-ceremony paths, the start of the sand aisle, or beside a shaded seating cluster. I leaned mine against a driftwood easel (a $35 farmhouse easel from Amazon) and added an asymmetrical eucalyptus garland. It looked intentional from every angle.
Scale matters. A 24×36″ board reads perfectly from 10–15 feet. Too small and guests crowd it. Too tall and it feels overpowering against dunes. For beach photos, matte surfaces photograph better than glossy ones.
2. Make the Welcome Sign: Materials, Scale, and Fonts
Choose material first: plywood, reclaimed wood, or clear acrylic.
My favorite combo for a beach look: 1/2″ birch plywood (24×36″, ~$20), sanded, stained in diluted walnut, then painted with off-white lettering. Birch takes paint beautifully and reads warm in photos.
Fonts: pick one script + one sans. Hand-letter scripts look custom. I traced a printed font (I used “Great Vibes” for headings and “Montserrat” for details), then painted with a small synthetic brush. If you don’t freehand, cut vinyl stencils with a Cricut Maker 3 ($360) and Oracal 651 vinyl ($7/sheet). Vinyl stencils give a crisp look without calligrapher prices.
Color choices that read coastal: muted sea-glass aqua, driftwood gray, and warm sand tan. Avoid bright teal or neon — they photograph flat on sunny beaches.
Budget options:
- Basic kit: plywood + paint + brushes ≈ $30–$50
- Mid kit: add stencils and sealer ≈ $60–$90
- All-in: Cricut + vinyl + sealer ≈ $400+ (only if you’ll reuse the machine)
If you’d rather buy supplies, I’ve rounded my go-to picks on Amazon (small commissions may apply): theoceanvows — items like the farmhouse easel and Oracal sheets are on that list.
3. Weatherproofing & Anchoring: Make It Last
Ugly truth: wind and salt eat signs. Flat paper signs will fly away or curl within minutes.
Sealing is non-negotiable. After paint dries, coat with 2–3 thin layers of an outdoor matte sealer (Rust-Oleum Painter’s Touch Matte, ~$6). For plywood, edge-seal with marine-grade spar varnish if the ceremony is tide-close.
Anchoring: screw a basic 5′ rebar stake into the back of a sign frame or use sandbags behind an easel. We tied fishing line to the easel and staked it down — low-visibility, high effectiveness.
For acrylic signs, use UV-resistant adhesive decals or a routed wooden frame. Avoid simple tape; salt air kills it.
4. Layer Texture with Coastal Table Décor
Your welcome sign starts the visual story. Echo it at the guest table.
Use the same palette and finishes on escort cards, menus, and a small sign at the bar. I bought shell place cards at a coastal home décor shop during a summer sale and scattered them near the sign; it tied everything together.
Mix materials: a wooden welcome board, linen table runners (oyster white), and driftwood centerpieces. That lived-in mix is what makes a sign feel handcrafted, not factory.
5. Ugly Truths: What Looks Good vs. Pinterest
Nobody tells you this, but:
- True ugly truth #1: Perfect script on thin paper will blow away or smear in salt air.
- Ugly truth #2: High-gloss acrylic photographs like a mirror and reads cheap at sunset.
- Ugly truth #3: Symmetry screams “store-bought.” Small imperfections sell authenticity.
Also: stencils can look mass-produced if every edge is razor-perfect. A little brush texture sells “made by hand.”
6. Finish With Florals, Favors, And Final Details
Frame the sign with an asymmetrical bunch of local greenery (eucalyptus + seeded eucalyptus) and 3–5 shells for scale. Keep flowers hardy: protea, spray roses, and seeded eucalyptus survive wind better than peonies.
A tiny chalkboard easel with a handwritten thank-you near the sign adds warmth. I used a 5×7” slate chalkboard ($8) with white chalk marker — instantly personal.
Wrap-up tip: Photograph the sign during setup and again during golden hour. If something shifts, you’ll know what to tweak early.
If you want my exact supply list (paints, brushes, the Oracal vinyl sheets, and the driftwood easel) I’ve linked my curated picks under the Amazon tag theoceanvows. Little commissions help cover my testing.
Make the sign once, and it becomes part of your wedding memory — not a backdrop someone could rebrand for another couple. The result: guests stop, smile, and ask who made it. That’s the real compliment.