
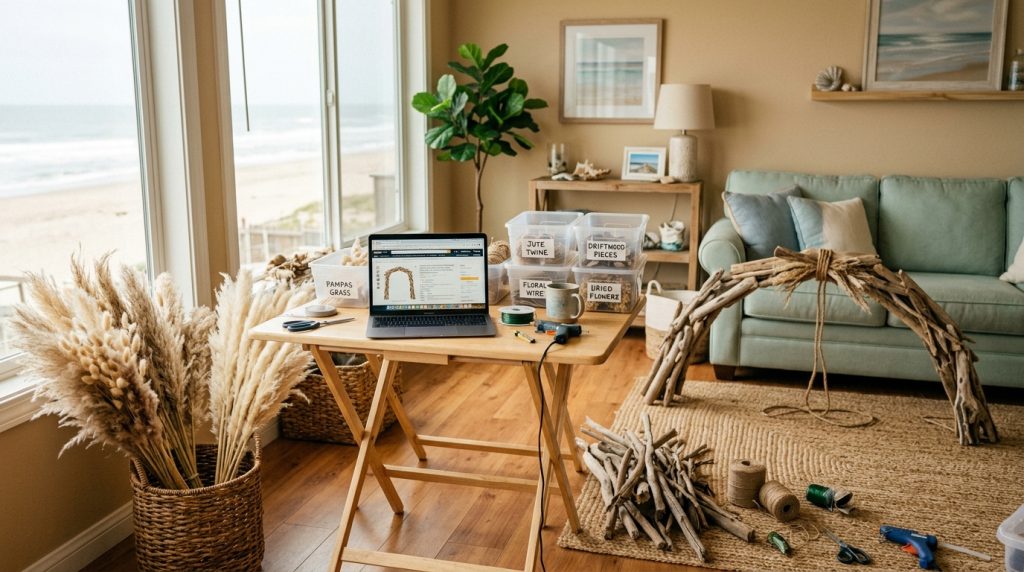
how to diy wedding decorations without turning your living room chaotic is the exact question I asked myself the week before my cousin’s beach elopement.
I learned fast which projects were worth the mess. This guide shows step-by-step décor you can build at home, what to buy, what to skip, and how to keep your living room usable while you DIY — all for about $500–$1,200 depending on how crafty you get.
This plan fits barefoot luxury, intimate micro-weddings, and budget-conscious destination couples. Expect boho-coastal textures, dried-floral trends, and driftwood accents. Lately I’ve noticed folks swapping perfect white arches for rugged driftwood pieces and muted, sandy palettes instead of bright nautical blue.
1. Set the Scene: Ceremony Arch and Aisle Styling
Result: A windproof, photo-ready arch that looks expensive.
Start with a simple frame: 1.5″ PVC pipes or a cheap wooden arbor kit. I used PVC (under $25) and stained it with tea for that weathered driftwood look.
Anchor it with 5-gallon sand bags or concrete pavers in canvas covers. The trick is weight, not glue.
Drape one wide chiffon panel (108″ x 54″) on one side for a breezy look. Sheer holds less sand than linen and photographs better in harsh sun.
Add greenery swags or a dried flower cluster on the weighted side to hide hardware.
Materials + cost (est):
- PVC frame or basic arbor kit: $25–$80
- Sandbag anchors / pavers + canvas covers: $20–$60
- 1 chiffon panel (108″): $12–$30
- Dried flower bunch (pampas, palm spears): $20–$60
Shopping tip: I ordered battery-powered LED fairy lights and hurricane lanterns on Amazon (search “battery hurricane lanterns” — tag theoceanvows) for $18–$35. Choose battery units for sand and safety.
Why it works: Weight prevents catastrophe. Chiffon hides seams and moves beautifully on windy days. Driftwood tones read as intentional coastal styling, not props.
2. Layer Texture with Coastal Table Décor
Result: Tables that survive wind and salt with layered interest.
Use 36″ rounds or long banquets with burlap runners over neutral linen. Avoid loose napkins — tuck them or use napkin rings. Glue shells sparingly to place cards so they don’t fly off.
Centerpieces: shallow driftwood trays with a gap for candles in glass hurricanes (battery tealights inside). Low arrangements survive wind better than tall ones.
Buy a set of glass hurricane vases (Ikea or Amazon, tag theoceanvows) and reuse them across tables.
Materials + cost (est):
- Linen tablecloth + burlap runner: $25–$60/table
- Glass hurricanes (set of 6): $25–$45
- Battery tea lights / LED candles: $12–$30
- Shells & driftwood accents: $10–$40
Shopping tip: Buy shells in bulk from local coastal shops when on sale; I found a bag of mixed shells at a seaside decor shop for $18 during a summer sale and it lasted three parties.
Why it works: Low, anchored centerpieces mean fewer candles knocked over and better photos. Neutral textures read luxe against sand.
3. Dress for Sand and Wind: Bridal & Groom Essentials
Result: Looks that actually last through tide, sweat, and wind.
Choose shoes you can walk in (wedged espadrilles or leather sandals with straps). I recommend 1–2” wedged espadrilles for beach photos and a barefoot option for the sand aisle.
Veils: clip weights into the hem or use a combed veil under a loose ponytail. I used small brass hairpins and saved myself several mid-ceremony flaps.
For the groom: swap heavy blazers for unstructured linen jackets or suspenders and a linen shirt.
Materials + cost (est):
- Espadrilles or sandals: $40–$120
- Hairpins / veil weights: $8–$15
- Linen jacket / shirts (groom): $60–$150
Shopping tip: Lightweight fabrics photograph better and are cooler. Pack a small sewing kit and extra bobby pins in your emergency bag.
Why it works: Practical choices keep photos natural. No one remembers a perfect blowout; they remember the moment.
4. Finish with Florals, Favors, and Final Details
Result: Personal touches that survive the elements and pack down easily.
Go dried for table botanicals: they withstand sun and salt, and you can buy in advance. Mix fresh bouquet blooms with dried accents for the ceremony bouquet only.
Favors: small jars of local sea salt, seed packets, or mini succulents wrapped in twine. I wrapped mini olive oil bottles in kraft paper tags bought from Amazon (search “kraft favor tags theoceanvows”).
Stationery: use heavier cardstock and a small clothespin to attach name shells to napkins — they won’t blow away if clipped.
Materials + cost (est):
- Dried flower bundles: $15–$45 each
- Favor jars / succulents: $1.50–$6 each
- Heavy cardstock invites (print at home or local print shop): $0.80–$2 each
Shopping tip: Assemble favors in clear plastic bins (Ikea Samla) with dividers — they keep pieces sorted and reduce spills at home.
5. Keep Your Living Room Sane: Staging, Workflow, and Packdown
Result: No sand avalanche, no permanent glitter carpet.
Ugly truth #1: DIYing without zones turns your living room into a landfill.
Ugly truth #2: Glue, sand, and glitter hide for months.
Ugly truth #3: Battery candles die mid-rehearsal if not tested.
Set up three stations: Prep (cutting/assembly), Paint/Dye (outdoor or garage), and Staging (final assembly for transport).
Use clear stackable bins with labels. I used 18-gallon bins and labeled with painter’s tape. Keep trash liners and a broom by the door.
Protect floors with a $10 canvas drop cloth under any work table. Pack a “ceremony kit” with spare pins, tape, scissors, and a battery pack.
Packdown plan: pack ceremony arch pieces into one labeled bin, tabletop decor into another, and fragile items into a third with bubble wrap. Load bins last into the car so they’re easiest to access at the venue.
Why it works: Zones limit mess and speed up transport. Labeling avoids the frantic hunt for “the small bag of shells” three hours before guests arrive.
Common mistakes (short list):
- Over-ambitious large projects the week of the wedding.
- Picking white fabrics that show every grain of sand.
- Skimping on weights and anchors for outdoor décor.
Final thought: DIY can save money and add personality, but only if you plan your process as much as your Pinterest board. Start with what shows in photos (arch, tables, bouquet). Stage smart, buy a few key reusable pieces (hurricane vases, bins, battery candles — search Amazon tag theoceanvows), and enjoy the calm. Pack up quickly. Go barefoot down the aisle.