
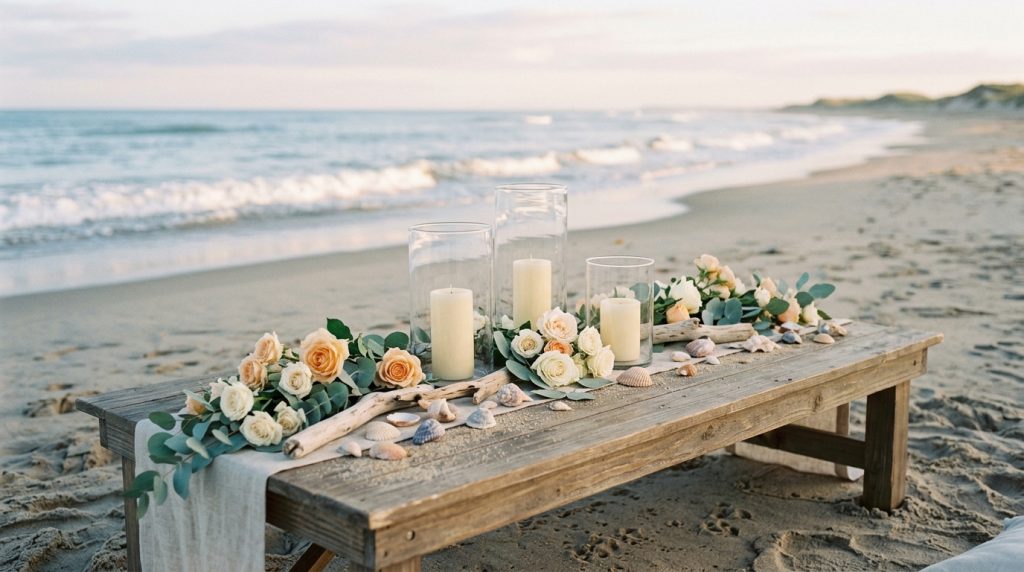
You can make beach wedding centerpieces that look like a florist’s work for under $20 each. I’ll show you how I did it—using grocery-store blooms, inexpensive candles, and a few tricks to stop wind and sand from ruining the look.
If you want step‑by‑step guidance on how to make diy wedding centerpieces that survive sun, salt, and seagulls, this guide is for intimate seaside ceremonies and budget-conscious receptions. Expect to spend roughly $8–$25 per centerpiece depending on glass and candle choices.
The vibe I love is barefoot-luxe: neutral linens, low arrangements, and lots of texture—driftwood, shells, and soft greenery. This approach suits elopements, micro-weddings, or reception head tables and trends toward sustainability (less foam, more reuse). I noticed couples leaning away from tall formal arrangements toward low, layered décor for better photos and social mingling.
1. Set the Scene: Ceremony Arch and Aisle Styling
Start with a simple arch. A driftwood or bamboo arch reads beachy without looking staged.
Keep floral weight light. Use a single spray on one corner with eucalyptus and a few garden roses. This saves money and keeps the arch from tipping in wind.
Line the aisle with low clusters—mason jars wrapped in twine or small hurricane vases with a votive inside. They read cohesive with the table centerpieces and won’t block views in photos.
Tip: anchor aisle jars with a handful of coarse sand at the bottom. It stabilizes glass in the wind and echoes your centerpiece bases.
2. Layer Texture with Coastal Table Décor
Low centerpieces are better on the sand. They keep sightlines clear and photos flattering.
Start with a base: runner, scatter of shells, or a long driftwood piece down the center. Then layer glass hurricanes, pillar candles, and small bud vases. The mix of heights (low vase + medium pillar + tiny votive) reads intentional and lush.
Scale: for 60-inch round tables, three small groupings (one 6–8″ hurricane + two 3–4″ bud vases) fill the space without overcrowding. For long banquet tables, repeat the trio every 24–30 inches.
Visual tip: repeat one color (blush roses or white spray roses) in every grouping so the eye ties the table together.
3. Dress for Sand and Wind: Bridal Look Essentials
The centerpieces should never compete with the bride’s silhouette. Keep them low and soft.
Ugly truth #1: tall arrangements topple in wind and block photos. I watched a seven-foot floral column get knocked over halfway through a ceremony. Don’t be that wedding.
Use sturdy containers. Thick‑walled glass hurricanes, weighted terracotta, or metal tins survive the elements and won’t tip easily.
Bring extra clips and floral tape. Humidity makes flowers droop faster than you expect. A quick re‑trim and fresh water top-up in the hour before guests arrive works wonders.
4. Make the Centerpiece: Step-by-Step Using Candles + Grocery Flowers
Materials (per centerpiece, approximate costs I paid):
- 6–8″ glass hurricane or 4″ wide mason jar — $6–$15 (Amazon, IKEA, Target)
- 3″ pillar candle (unscented) — $3–$6 (Target, Walmart)
- 2–3 small bud vases or jam jars — $1–$3 each (dollar store, TJ Maxx)
- Grocery flowers: 6–8 focal stems (spray roses/roses), 6–10 filler stems (waxflower, limonium), greenery (eucalyptus) — $8–$18 (Trader Joe’s, Whole Foods, Costco)
- Coarse sand or aquarium gravel (optional) — $1–$3
- Floral tape, scissors, zip ties — $5–$10
Step 1 — Prep glass: Rinse and dry vases. Add one to two inches of coarse sand or pebbles in the hurricane for weight. The sand keeps the vessel steady on windy tables and adds a beachy baseline.
Step 2 — Candle placement: Set the pillar in the center of the hurricane. If you’re worried about wind, trade for a battery-operated LED pillar; the look is surprisingly similar and lasts through a long reception.
Step 3 — Arrange flowers: Trim stems at a 45° angle. Use one focal bloom or small cluster in each bud vase. Create 2–3 bud vases per centerpiece and tuck them around the candle. Add a short sprig of eucalyptus flat on the sand or tied to the hurricane with twine.
Step 4 — Final styling: Scatter small shells around the base, or rest a piece of driftwood across two vases for texture. If you want a glow without flame, add a battery votive in the bud vases.
Timing: Assemble centerpieces the morning of the event or the night before and refrigerate overnight in a cool place (not freezing). If you can’t refrigerate, build and hydrate them 1–2 hours before guests arrive.
Ugly truth #2: grocery flowers wilt faster than florist-grade stems. I always buy an extra 20% and swap out any sad blooms right before doors open.
Product note: I used a pack of hurricane vases bought on Amazon for $13 each—search “6 inch hurricane vase” and append ?tag=theoceanvows to support my favorites without changing your price.
5. Finish with Florals, Favors, and Final Details
Keep emergency supplies in a “touch-up” kit: snips, bottled water, floral tape, lighter for candles, spare LED candles.
Ugly truth #3: open flame and sand are a mess. Battery candles are a tiny splurge that saves waxy tablecloths and sleepy servers.
Repurpose leftovers. Extra grocery roses made simple boutonnières and clutch bouquets for photos. Guests loved snagging small posies to take home.
I spent about $150 on flowers and candles for a 10‑table reception, plus $60 on glassware I reused at home. The look? Cozy, coastal, and completely doable without a florist.
If you want my exact hurricane vase and LED candle picks, I keep a short Amazon list (search for the product name and add ?tag=theoceanvows). Try one centerpiece on your table the week before the wedding to see how it holds up. It’ll save you a last-minute scramble—and that’s worth more than the extra mason jars.